This artisan bread recipe is perfect for home bakers looking to create a crusty, flavorful loaf. With just a few simple ingredients and minimal hands-on time, you can enjoy freshly baked bread right from your oven.
The process involves mixing, resting, and baking, allowing the dough to develop a rich flavor and texture. You can customize it with herbs or seeds to enhance the taste.
Creating the Perfect Artisan Bread
Crafting artisan bread at home is a rewarding experience that brings the warmth of a bakery right into your kitchen. The process is straightforward, requiring only a few basic ingredients and some patience.
The magic begins with a simple mixture of flour, salt, and yeast, combined with warm water to create a shaggy dough. This initial step is crucial as it sets the foundation for the bread’s texture and flavor.
Once mixed, the dough needs time to rest and rise, allowing the yeast to work its magic. This resting period is where the flavors develop, leading to a crusty exterior and a soft, airy interior.
For those who enjoy experimenting, consider adding herbs or seeds to customize your loaf. These additions can elevate the bread, making it uniquely yours.
The Art of Rising
The first rise is a pivotal moment in the bread-making process. After mixing the ingredients, cover the bowl and let it sit at room temperature for about two hours.
During this time, the dough will expand, becoming light and airy. This rise is essential for developing the bread’s structure, creating those delightful air pockets that are characteristic of artisan loaves.
After the first rise, gently turn the dough onto a floured surface. Folding it over itself a few times helps shape it into a ball, preparing it for the second rise.
Place the dough seam-side down in a proofing basket or bowl, cover it, and let it rest for another 30 minutes. This final rise ensures the bread achieves its desired height and texture.
Baking to Perfection
As the dough completes its second rise, it’s time to preheat the oven. Set it to 450°F (230°C) and place a Dutch oven inside to heat up.
This step is crucial for achieving a crispy crust. The hot Dutch oven creates a steamy environment, which helps the bread rise further during baking.
Once preheated, carefully transfer the dough into the hot Dutch oven, cover it with the lid, and bake for 30 minutes.
After this initial baking period, remove the lid and continue baking for an additional 15-20 minutes. This will give the bread its signature golden-brown crust, inviting you to slice into it.
Cooling and Slicing
After baking, it’s important to let the bread cool before slicing. Transfer it to a wire rack and allow it to rest for at least 30 minutes.
This cooling period helps set the crumb structure, ensuring each slice is perfect.
Once cooled, grab a bread knife and slice into your artisan loaf. The soft interior and crispy crust will make each slice a delight.
For an extra treat, serve it with a small bowl of olive oil for dipping. The combination of flavors will enhance your enjoyment of this homemade masterpiece.
Enjoying Your Artisan Bread
Artisan bread is versatile and can be enjoyed in numerous ways. Serve it alongside soups, salads, or as the base for a delicious sandwich.
Its rustic appearance and hearty flavor make it a wonderful addition to any meal.
Whether shared with family or savored solo, each bite of your freshly baked artisan bread is a testament to your baking skills.
So, gather your ingredients, embrace the process, and enjoy the fruits of your labor. Your cozy kitchen will soon be filled with the irresistible aroma of freshly baked bread.
Tips for Success
To ensure your artisan bread turns out perfectly every time, consider a few helpful tips.
First, measure your ingredients accurately. Using a kitchen scale can help achieve precise measurements, leading to consistent results.
Second, don’t rush the rising process. Allowing the dough to rise fully is key to achieving that airy texture.
Lastly, experiment with different flours or add-ins to find your favorite combination.
With practice, you’ll master the art of artisan bread making, creating loaves that are not only beautiful but also delicious.
Homemade Artisan Bread Recipe
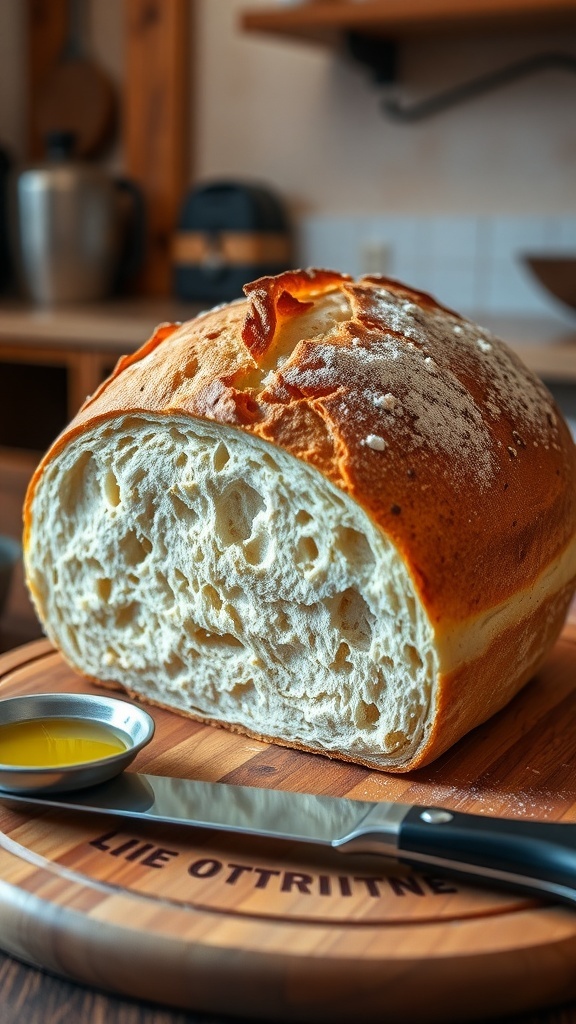
This artisan bread features a crispy crust and a soft, airy interior. The recipe takes about 3 hours from start to finish, including resting time, and yields one large loaf.
Ingredients
- 3 cups all-purpose flour
- 1 1/2 teaspoons salt
- 1/2 teaspoon instant yeast
- 1 1/2 cups warm water
Instructions
- Mix the Dough: In a large bowl, combine the flour, salt, and yeast. Add the warm water and stir until a shaggy dough forms.
- First Rise: Cover the bowl with plastic wrap or a kitchen towel and let it rest at room temperature for 2 hours.
- Shape the Dough: After the first rise, turn the dough out onto a floured surface. Fold it over itself a few times to shape it into a ball.
- Second Rise: Place the dough seam-side down in a floured proofing basket or bowl. Cover and let it rise for another 30 minutes.
- Preheat the Oven: About 30 minutes before baking, preheat your oven to 450°F (230°C) with a Dutch oven inside.
- Bake the Bread: Carefully remove the hot Dutch oven from the oven. Transfer the dough into it, cover with the lid, and bake for 30 minutes. Remove the lid and bake for an additional 15-20 minutes until golden brown.
- Cool: Once baked, transfer the bread to a wire rack to cool before slicing.
Cook and Prep Times
- Prep Time: 15 minutes
- Resting Time: 2 hours 30 minutes
- Total Time: 3 hours
- Servings: 12 slices
- Calories: 120kcal
- Fat: 0.5g
- Protein: 4g
- Carbohydrates: 24g
Related
- Delicious Artisan Charcuterie Board Recipe
- Artisan Charcuterie Board Recipe
- Artisan Charcuterie Snack Board Recipe
- Homemade Artisan Bread Recipe