This vintage bread recipe offers a simple yet satisfying way to create homemade bread with a delightful crust and soft interior. Using basic ingredients such as flour, yeast, and water, this recipe brings back the traditional flavors of bread-making.
Perfect for sandwiches or as a side for soups and stews, this bread is easy to make and requires minimal equipment. You can enjoy the process of kneading and shaping the dough, resulting in a delicious loaf that fills your home with a warm aroma.
The Art of Baking Vintage Bread
Baking vintage bread is a delightful experience that connects us to traditional methods of food preparation. The process begins with simple ingredients, allowing anyone to create a loaf that embodies the essence of home cooking.
The satisfaction of kneading dough and watching it rise is unparalleled. This hands-on activity brings a sense of accomplishment and joy, especially when the aroma of freshly baked bread fills the kitchen.
Ingredients for Success
To create a rustic loaf, you’ll need a few basic ingredients. Flour, yeast, and water form the foundation of this recipe, while salt enhances the flavor. Optional additions like sugar and olive oil can further enrich the taste and texture.
Using high-quality ingredients is essential for achieving the best results. The choice of flour can influence the bread’s texture, so selecting all-purpose flour is a great starting point.
The Kneading Process
Kneading is a crucial step in bread-making. It develops the gluten, giving the bread its structure and chewiness. A well-kneaded dough should be smooth and elastic, making it easier to shape into a loaf.
Spending around ten minutes kneading the dough on a floured surface will yield a satisfying texture. This physical engagement not only helps in the bread-making process but also adds to the overall enjoyment of baking.
The Rising Stages
Rising is where the magic happens. After kneading, the dough needs to rest in a warm environment, allowing the yeast to work its wonders. This first rise typically takes about 1 to 1.5 hours, during which the dough doubles in size.
Once the dough has risen, it’s time to shape it into a loaf. This step is both practical and artistic, as you can create a shape that suits your baking style. After shaping, a second rise of about 30-45 minutes prepares the dough for baking.
Baking to Perfection
Preheating the oven is vital for achieving that golden-brown crust. Baking at the right temperature ensures that the exterior becomes crispy while the interior remains soft and airy.
After 30-35 minutes in the oven, the bread should sound hollow when tapped on the bottom, indicating it’s done. Allowing the loaf to cool on a wire rack prevents it from becoming soggy and enhances the overall texture.
Enjoying Your Homemade Bread
Once cooled, slicing into the loaf reveals its fluffy interior, perfect for sandwiches or served alongside soups and stews. The warm, inviting aroma and the rustic appearance make it an ideal centerpiece for any meal.
Sharing this homemade bread with family and friends creates a warm atmosphere, making every meal feel special. The simple act of baking can transform an ordinary day into a memorable occasion.
Homemade Vintage Bread Recipe
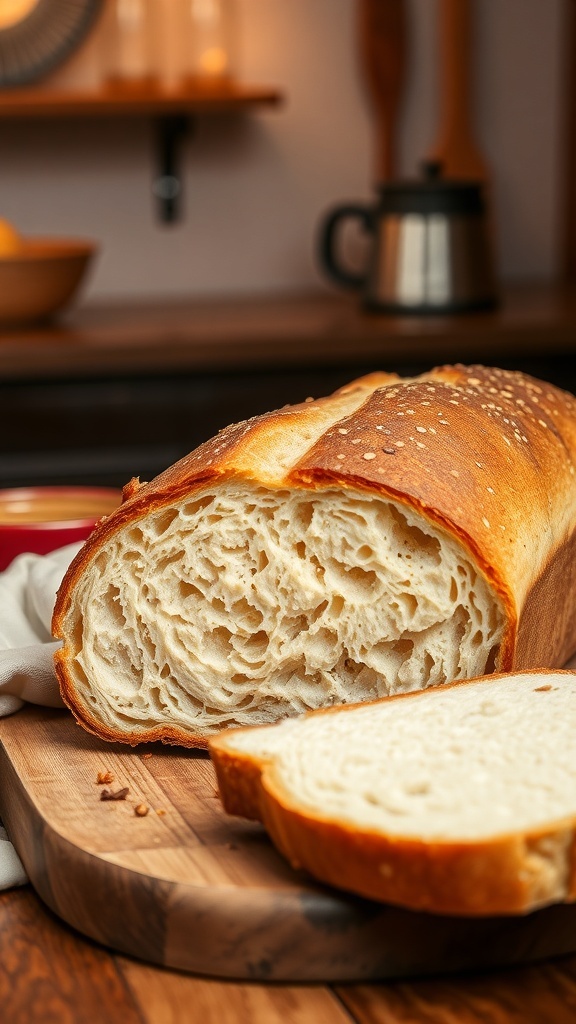
This classic bread features a crispy crust and a soft, airy crumb. The recipe takes about 3 hours from start to finish, including rising time, and yields one large loaf.
Ingredients
- 4 cups all-purpose flour
- 2 teaspoons active dry yeast
- 1 1/2 teaspoons salt
- 1 1/2 cups warm water (about 110°F)
- 1 tablespoon sugar (optional)
- 1 tablespoon olive oil (optional)
Instructions
- Mix the Dry Ingredients: In a large bowl, combine the flour, yeast, and salt. If using sugar, add it as well.
- Add Water: Gradually pour in the warm water and mix until a shaggy dough forms.
- Knead the Dough: Transfer the dough to a floured surface and knead for about 10 minutes until smooth and elastic.
- First Rise: Place the dough in a lightly greased bowl, cover with a clean towel, and let it rise in a warm place for about 1 to 1.5 hours, or until doubled in size.
- Shape the Loaf: Punch down the risen dough and turn it out onto a floured surface. Shape it into a loaf and place it in a greased loaf pan.
- Second Rise: Cover the loaf with a towel and let it rise again for about 30-45 minutes, or until it has risen above the edge of the pan.
- Preheat Oven: Preheat your oven to 375°F (190°C).
- Bake: Bake the bread for 30-35 minutes, or until golden brown and sounds hollow when tapped on the bottom.
- Cool: Remove the bread from the pan and let it cool on a wire rack before slicing.
Cook and Prep Times
- Prep Time: 20 minutes
- Cook Time: 35 minutes
- Total Time: 3 hours
- Servings: 12 slices
- Calories: 120kcal
- Fat: 1g
- Protein: 3g
- Carbohydrates: 24g
Related
- Vintage AT Computer Case
- What age is considered vintage?
- What is considered vintage 2023?
- 5 Vintage-Inspired Decor Ideas for a Retro Christmas