Looking for a fun and engaging way to express your artistic side? This 3D turkey art project is perfect for all ages, especially during festive seasons like Thanksgiving. It’s a fantastic opportunity to unleash your creativity while crafting a unique centerpiece for your table or home decor.
This project combines simple materials with imaginative design, allowing you to create a delightful turkey that stands out. Whether you’re an experienced artist or just starting, you’ll find this project both enjoyable and rewarding.
Gathering Your Materials
Before diving into the creative process, it’s essential to gather all the necessary materials. This project primarily requires colored construction paper or cardstock, and cardboard for the base.
Scissors, glue or tape, and markers or paints will also be needed to bring your turkey to life. To add a fun twist, consider incorporating googly eyes and additional decorative elements like glitter or feathers.
Creating the Turkey’s Body
The first step involves crafting the turkey’s body. Cut out an oval shape from the cardboard, which will serve as the main body of your turkey. A smaller oval shape will be used for the head.
Ensure that the sizes are proportionate, as this will affect how the turkey stands and looks. Once you have the shapes ready, you can begin to personalize your creation.
Adding Colorful Feathers
Next, it’s time for the turkey’s vibrant feathers! Cut various shapes from your colored construction paper in shades of red, orange, and yellow.
These colorful feathers will be attached to the back of the turkey’s body. Use glue or tape to secure them in place, arranging them in a fanned-out position for a lively appearance.
Decorating the Face
Move on to the turkey’s face, an area that deserves special attention. Use markers or paints to create eyes, a beak, and other facial features on the head.
If you want to add a whimsical touch, glue on googly eyes. This simple addition can transform the turkey into a charming centerpiece that will capture the attention of all who see it.
Assembling Your Turkey
With the body and head ready, it’s time to assemble your turkey. Attach the head to the body, ensuring that it stands upright securely. If desired, you can add additional cardboard pieces to create legs.
Take a moment to adjust the positioning so that your turkey looks stable and proud. This final assembly step is crucial for achieving the desired 3D effect.
Final Touches and Display
Once your turkey is fully assembled, it’s time to add the finishing touches. Decorate your creation with any extra embellishments you desire, such as glitter or additional feathers.
Now, find a special spot to display your turkey art project. A festive table setting with autumn decorations will enhance the warm and inviting atmosphere, making it the perfect centerpiece for the holiday season.
Step-by-Step Guide to Creating 3D Turkey Art
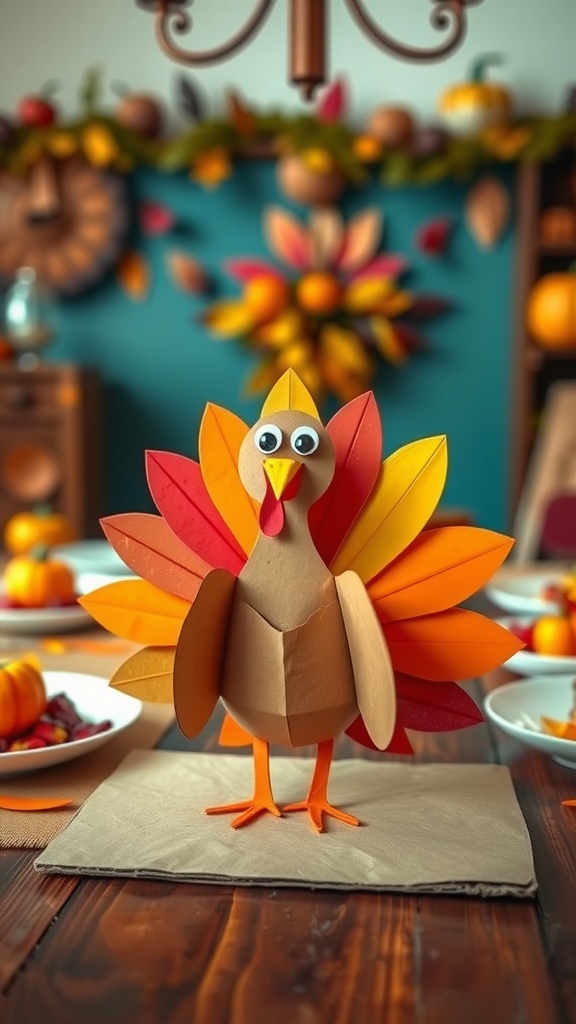
This 3D turkey art project uses common materials like paper, cardboard, and paints to create a vibrant and eye-catching decoration. The finished piece is fun, colorful, and a great way to bring some holiday spirit into your home.
Ingredients
Related
- Creative Lobster Wall Art Project
- Creative 3D Turkey Art Project
- Potato Print Art Project
- Wacom Intuos Art vs Wacom Intuos Draw