Easter is a special time of the year, filled with joy and creativity. This Decorative Easter Egg recipe will not only brighten your celebrations but also allow you to express your artistic side. It’s a fun activity that the whole family can enjoy together, making beautiful eggs that can be used for decoration or as gifts.
Imagine vibrant colors, intricate designs, and the satisfaction of creating something unique. This recipe combines eggs with natural dyes and embellishments to make stunning decorative pieces that will be the centerpiece of your Easter festivities.
The Charm of Decorative Easter Eggs
As Easter approaches, the excitement surrounding decorative eggs fills the air. These stunning pieces serve as a delightful representation of creativity and festivity. Each egg carries the potential to be a vibrant focal point, showcasing individual artistic expression. The process of creating these decorative items transforms eggs into unique works of art.
With a mix of colors, shapes, and embellishments, these eggs can brighten up any space. The intricate designs and playful stickers appeal to both young and old, making it a fantastic family activity. From the moment the first dye is mixed, to the final touch of glitter, the joy of crafting these beautiful decorations is truly contagious.
Gathering the Essentials
To embark on this colorful journey, gathering the right materials is essential. A selection of large eggs, vibrant natural dyes, and decorative items set the stage for creativity. Common dyes such as beets for red, turmeric for yellow, and red cabbage for blue provide natural and safe options for coloring eggs.
Paintbrushes, sponges, and various embellishments, such as stickers and glitter, enhance the artistic experience. For those wishing to preserve their creations, a clear sealant spray can add a glossy finish. Having all these materials on hand ensures a smooth and enjoyable crafting session.
Preparing the Eggs for Decorating
The journey to beautiful eggs begins with preparation. Hard boiling the eggs is the first step, ensuring they are sturdy enough for dyeing and decorating. Cooling the eggs in an ice bath after boiling not only stops the cooking process but also makes them easier to handle.
Once cooled, the eggs are ready to absorb vibrant colors. The excitement builds as each egg is dipped into the dyes, transforming them into colorful canvases awaiting decoration. This process is an art form in itself, as each egg reacts differently to the dye, yielding unique shades and patterns.
The Art of Dyeing
Dyeing the eggs is where the magic truly happens. The natural dyes create a stunning array of colors, allowing for layered hues and intricate designs. Dipping the eggs for varying lengths of time leads to different intensities, giving each piece its own character.
Once dyed, patience is key. Allowing the eggs to dry fully before adding decorations ensures that the designs remain intact. This period of waiting builds anticipation, and the sight of the vibrant, dried eggs is often enough to spark creativity for the next steps.
Decorating each egg opens up a world of possibilities. Using paintbrushes and sponges, intricate patterns can be painted onto the surface. Stickers and washi tape provide quick and fun ways to embellish the eggs, appealing to all ages.
For those looking to add a little sparkle, incorporating glitter and sequins can elevate the designs. Each egg becomes a personalized masterpiece, showcasing the creator’s style and flair. This stage of decorating is where imagination runs wild, and no two eggs need to look alike.
Displaying Your Creations
Once the eggs are beautifully adorned, it’s time to showcase them. Arranging the eggs on a rustic wooden table creates a charming display that captures the festive spirit of Easter. The combination of colors and designs draws the eye and invites admiration from guests.
Enhancing the display with bright flowers in the background complements the eggs, adding to the overall festive atmosphere. Whether used as table centerpieces or decorations around the home, these decorative Easter eggs bring joy and celebration into any space.
Creating Beautiful Easter Eggs
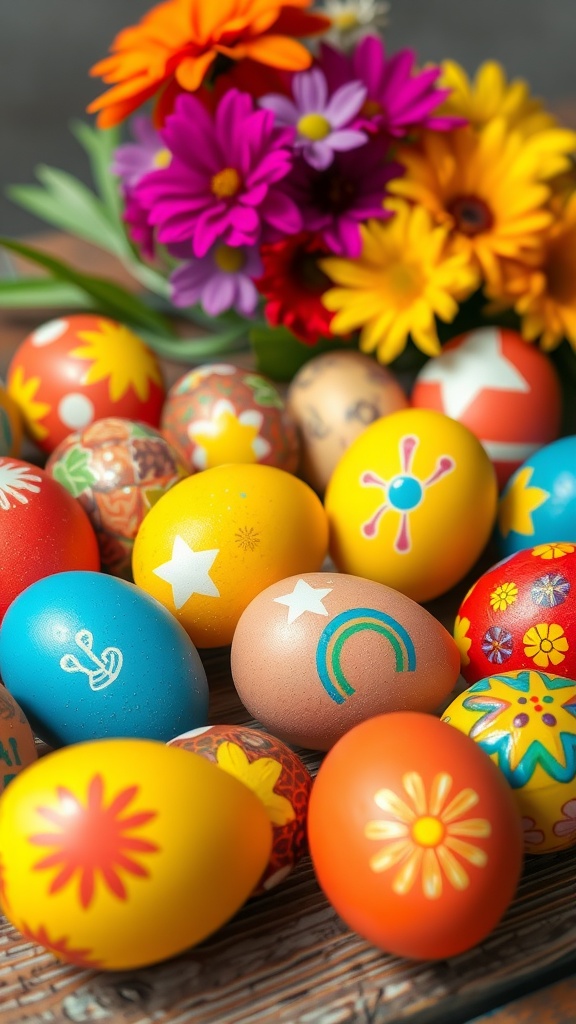
These decorative Easter eggs are made using real eggs, dyed with natural ingredients, and adorned with various decorations. Expect a delightful blend of colors and textures, providing a charming aesthetic for any Easter celebration.
Ingredients
- 6 large eggs
- 1 cup of water (for each dye)
- 1 tablespoon of vinegar (for each dye)
- Natural dyes (beets for red, turmeric for yellow, red cabbage for blue, etc.)
- Paintbrushes and sponges for application
- Stickers or washi tape for decoration
- Glitter and sequins (optional)
- Clear sealant spray (optional, for preservation)
Instructions
- Prepare the eggs: Hard boil the eggs by placing them in a pot of water, bringing it to a boil, and then simmering for 10-12 minutes. Once cooked, cool them in an ice bath.
- Make the dye: For each color, combine 1 cup of water, 1 tablespoon of vinegar, and your chosen natural dye in a pot. Simmer for about 30 minutes and strain the mixture.
- Dye the eggs: Dip the cooled eggs into the dye for 5-10 minutes, depending on the desired intensity of color. Remove and let dry on a paper towel.
- Decorate: Once the eggs are dry, use paintbrushes, sponges, stickers, or washi tape to create designs. Add glitter or sequins for extra flair.
- Seal the decorations: If desired, spray a light coat of clear sealant to preserve your designs and give them a glossy finish.
Cook and Prep Times
- Prep Time: 10 minutes
- Cook Time: 15 minutes
- Dyeing and Decorating Time: 1 hour
- Total Time: 1 hour 25 minutes
- Servings: 6 decorative eggs
- Calories: 70kcal (per egg, boiled)
- Fat: 5g
- Protein: 6g
- Carbohydrates: 1g
Related
- Decorative Garlic Jar Pottery
- Decorative Egg Ornaments for Festive Celebrations
- Decorative Banana Bread Recipe
- Decorative Focaccia Bread Recipe