This DIY Christmas drawings garland is a fun and creative way to add a personal touch to your holiday decorations. Using simple materials, you can create a festive display that showcases your artistic skills and brings holiday cheer to your home.
The project is suitable for all ages and can be customized with different themes, colors, and drawings to match your holiday decor.
Creating a Festive Atmosphere
Transforming your living space into a festive haven can be achieved with a simple DIY project. A Christmas garland made of colorful hand-drawn decorations not only adds a personal touch but also brings warmth and cheer to your home.
Imagine a cozy living room adorned with twinkling fairy lights, where each element of the garland tells a story. The vibrant colors and playful designs create an inviting atmosphere that welcomes guests and family alike.
Materials You Will Need
Gathering the right materials is essential for this creative endeavor. You will need colored paper or cardstock to serve as the canvas for your drawings. Markers, colored pencils, or crayons will bring your designs to life with vivid colors.
In addition, scissors will be necessary for cutting out your shapes, while a hole puncher will allow you to string your creations together. Twine or ribbon will be the final touch, providing a way to hang your garland. Optional items like tape or glue can help secure your decorations if needed.
Step-by-Step Guide to Crafting Your Garland
Start by drawing various Christmas-themed designs on your colored paper. Snowflakes, Christmas trees, and ornaments are excellent choices that capture the spirit of the season. Let your creativity flow as you fill the page with festive imagery.
Once your drawings are complete, carefully cut them out into the desired shapes. This step allows you to refine your creations and prepare them for stringing.
Assembling the Garland
After cutting out your shapes, it’s time to punch holes at the top of each drawing. This will enable you to thread them onto your twine or ribbon. Make sure to space them evenly for a balanced look.
Cut a length of twine or ribbon that suits your display area. Thread it through the holes of your drawings, creating a delightful garland that showcases your artistic flair. Once you have strung all your decorations, tie the ends securely.
Displaying Your Creation
Your garland is now ready to be displayed! Choose a prominent location, such as a wall, mantel, or doorway, where it can be admired by all. Attaching it with tape or glue can provide extra stability, ensuring it stays in place throughout the holiday season.
Consider draping your garland alongside fairy lights to enhance the festive glow. The combination of hand-drawn decorations and twinkling lights creates a magical ambiance that captures the joy of the holidays.
Personalizing Your Garland
This DIY project is highly customizable. Feel free to experiment with different themes, colors, and designs to match your holiday decor. You can involve family members or friends in the crafting process, making it a fun group activity.
Whether you opt for traditional colors or a more modern palette, your unique touch will make this garland a cherished part of your holiday celebrations. Enjoy the process and let your creativity shine!
Simple Steps to Create a Christmas Drawings Garland
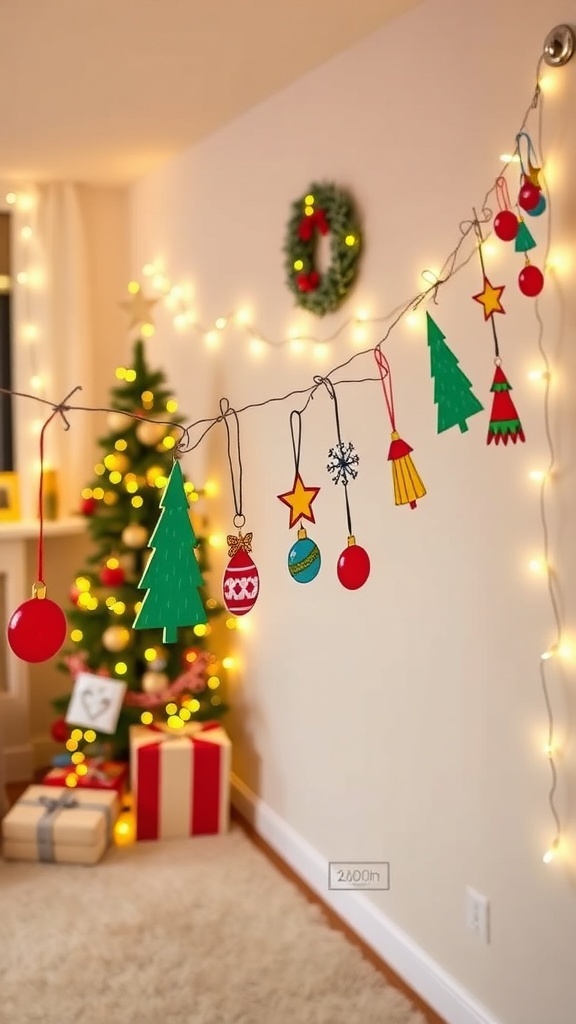
This garland features hand-drawn Christmas-themed designs such as snowflakes, Christmas trees, and ornaments strung together with twine or ribbon. The project takes about 1-2 hours to complete and can be displayed on walls, mantels, or doorways.