This guide provides step-by-step instructions on how to draw a duck. Whether you’re a beginner or looking to refine your skills, this straightforward approach will help you create a charming duck illustration.
You’ll learn about basic shapes, proportions, and techniques to capture the unique features of a duck, making it an enjoyable activity for artists of all levels.
Materials Needed for Duck Drawing
Before starting your duck drawing, gather the necessary materials to ensure a smooth process. You’ll need:
- Pencil
- Eraser
- Paper
- Black pen or marker (optional for outlining)
- Colored pencils or markers (optional for coloring)
Having these items ready will help you focus on your drawing without interruptions. A good quality paper can enhance the overall look of your artwork, so choose one that suits your preference.
Step 1: Start with Basic Shapes
Begin your drawing by sketching the basic shapes that form the foundation of the duck. Draw an oval for the body, which will serve as the main structure.
Next, add a smaller circle for the head. Connect the head and body with a curved line to represent the neck. This simple approach helps in maintaining the correct proportions as you proceed.
Step 2: Add the Beak
Once the basic shapes are in place, it’s time to give your duck its distinctive features. Sketch a triangle shape extending from the head to create the beak.
Make sure the triangle is proportionate to the head size. This step is crucial as the beak is one of the most recognizable aspects of a duck.
Step 3: Outline the Body
With the basic shapes established, refine the outline of the body. Add curves to create the tail and wings, giving your duck a more natural appearance.
Focus on smooth lines and gentle curves to enhance the overall shape. This is where your duck starts to take form, so pay attention to the details.
Step 4: Draw the Legs
Next, add the legs by drawing two short lines extending from the bottom of the body. At the end of each leg, sketch the webbed feet.
The webbed feet are essential for a duck’s swimming ability, so ensure they are clearly defined. This detail adds character and authenticity to your drawing.
Step 5: Detail the Features
Now it’s time to bring your duck to life with details. Add eyes, feather textures, and any additional features you want to highlight.
These details will enhance the personality of your duck. Take your time to make sure everything looks just right before moving on.
Step 6: Finalize the Drawing
Once you are satisfied with your sketch, use a black pen or marker to outline your drawing. This step helps to define the shapes and gives your artwork a polished look.
After outlining, erase any unnecessary pencil lines to clean up your drawing. This will make the final piece look neat and professional.
Step 7: Color Your Duck
If you wish to add color, now is the time to use your colored pencils or markers. Choose vibrant colors that reflect the natural beauty of ducks.
Coloring can be a fun way to express creativity, so feel free to experiment with different shades and techniques. Once finished, your duck illustration will be complete!
Step-by-Step Duck Drawing Instructions
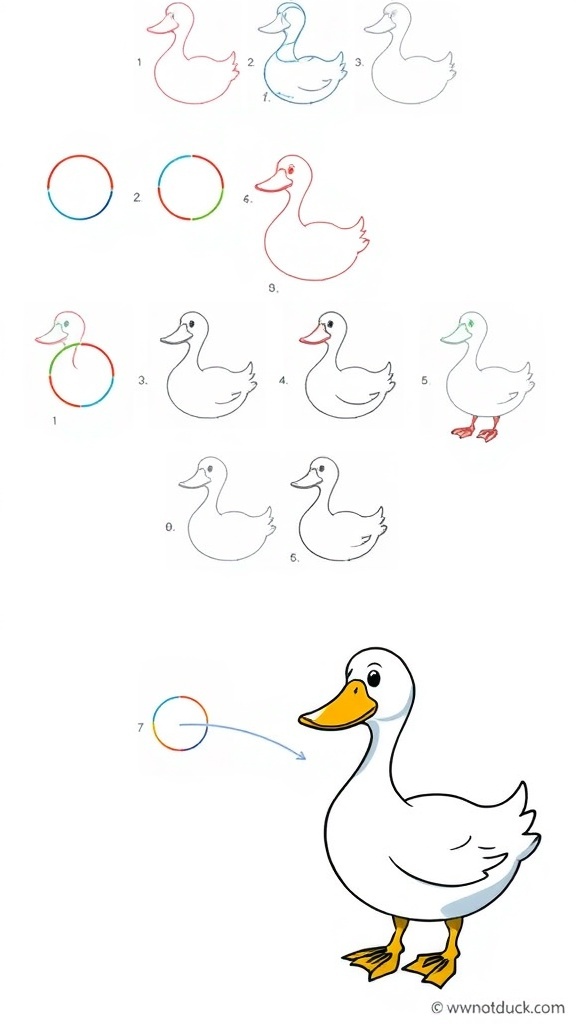
This drawing guide outlines the process of sketching a duck, focusing on simple shapes and lines to build your drawing. The steps are designed to be easy to follow, ensuring a successful outcome.
Ingredients
Related
- Is it daisy or daphne duck?
- What does rubber duck mean in cb talk?
- Does it hurt if a duck bites?
- Is chica chicken or a duck?