Creating a duck keychain is a fun and simple craft project that can be completed in a short amount of time. This guide will walk you through the materials needed and the steps to make your own unique duck keychain.
Whether you’re looking for a cute accessory or a personalized gift, this duck keychain is a great choice. You can customize it with different colors and designs to match your style.
Materials Needed for Your Duck Keychain
To create your vibrant duck keychain, gather the following materials:
- Felt or fabric in yellow and orange
- Keychain ring
- Scissors
- Fabric glue or needle and thread
- Black beads or buttons for eyes
- Marker or fabric pen for detailing
These items are easily accessible and can be found at most craft stores. Choosing high-quality felt will ensure your keychain is durable and visually appealing.
Preparing Your Workspace
Before starting your crafting project, it’s essential to set up a comfortable workspace. Clear a flat surface and gather all your materials. Having everything within reach will streamline the process.
Consider using a cutting mat or a piece of cardboard to protect your surface when cutting the felt. This will help keep your workspace tidy and make cleanup easier.
Creating the Duck Shape
Begin by cutting out the duck shape from the yellow felt. Use a pair of scissors to carefully outline the body and wings. For the beak, cut a smaller piece from the orange felt.
Precision is key here, as a well-cut shape will result in a more polished final product. Don’t rush this step; take your time to ensure the pieces are shaped correctly.
Assembling Your Duck Keychain
Once you have all your pieces cut out, it’s time to assemble your duck. Start by attaching the beak to the duck’s face using fabric glue or by sewing it on. Next, position the wings on either side of the body and secure them in place.
This step allows for creativity, as you can adjust the placement of the wings to give your duck a unique look. Make sure everything is securely attached before moving on to the next step.
Adding Eyes and Final Touches
For the eyes, glue or sew black beads or buttons onto the duck’s face. This simple addition brings your duck to life and adds character to your keychain.
After the eyes are in place, use a marker or fabric pen to add any additional details, such as feathers or a smile. These finishing touches will enhance the overall appearance of your keychain.
Attaching the Keychain Ring
The final step is to attach the keychain ring. Use a small hole punch to create a hole at the top of the duck. Thread the keychain ring through the hole, ensuring it is secure.
Allow any glue to dry completely before using your new duck keychain. Once dry, it’s ready to be attached to your keys or bag, adding a touch of charm to your everyday items.
DIY Duck Keychain Instructions
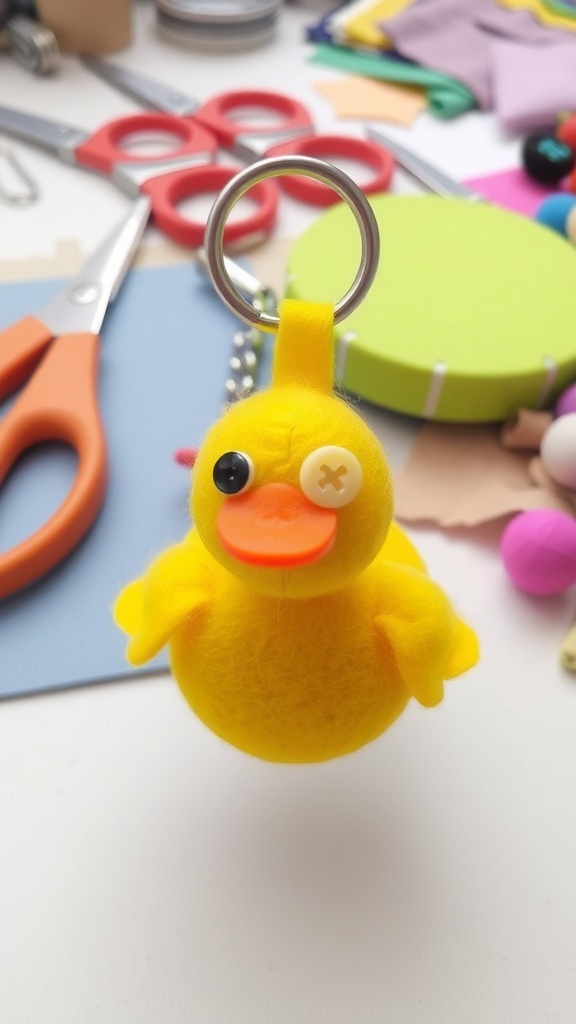
This duck keychain project is perfect for beginners and can be made using felt, fabric, or even polymer clay. The crafting process takes about 30 minutes and results in a charming keychain that can be used on bags or keys.
Ingredients
Related
- Miniature Taco Keychain Crafting Tutorial
- Duck Plushie Crafting Guide
- Duck-Shaped Vase Crafting Recipe
- Crochet Duck Keychain Pattern