This fun and creative duck nail art design is perfect for those looking to add a playful touch to their manicure. Using vibrant colors and simple techniques, you can achieve a charming look that showcases adorable duck motifs.
The design is suitable for various occasions, whether it’s a casual outing or a themed party. With just a few basic nail art supplies, you can create this eye-catching style.
Overview of Duck Nail Art Design
This delightful nail art design brings a splash of joy to any manicure.
With its bright yellow polish and charming duck faces, it’s perfect for those who want to express their playful side.
The whimsical nature of this design makes it suitable for various occasions, from casual outings to themed parties.
Materials Needed for Your Nail Art
To create this eye-catching duck nail art, gather a few essential supplies.
You will need a base coat to protect your nails, followed by bright yellow nail polish as the main color.
Additional colors include white, black, and orange nail polishes for the duck faces and details. A top coat will seal your design, while a nail art brush or dotting tool will help you create those adorable features.
Step-by-Step Process
Start by prepping your nails.
Ensure they are clean and dry, then apply a base coat to provide a protective layer.
Once that’s dry, paint all your nails with the vibrant yellow polish, allowing it to dry completely before moving on.
Next, focus on the accent nails where the duck faces will be painted.
Using a nail art brush or dotting tool, create white circles for the eyes, followed by black dots for the pupils and an orange triangle for the beak.
These simple shapes come together to form the cute duck faces that make this design so special.
Adding the Finishing Touches
Once the duck faces are dry, you can enhance the design with additional details.
Consider adding tiny wings or water ripples around the ducks using a fine brush.
These little touches will elevate your nail art and make it even more charming.
Sealing and Cleaning Up Your Nail Art
After you’re satisfied with your design, it’s time to seal it.
Apply a top coat to protect your artwork and add a glossy finish.
This step is crucial for ensuring your nail art lasts longer and remains vibrant.
Finally, clean up any excess polish around your cuticles with nail polish remover.
This will give your manicure a polished and professional look, allowing the playful duck faces to shine.
Enjoying Your Playful Nail Art
Now that your duck nail art is complete, take a moment to admire your handiwork.
This design not only showcases your creativity but also adds a fun element to your style.
Whether you’re heading to a casual gathering or a themed event, your nails will surely be a conversation starter!
Charming Duck Nail Art Tutorial
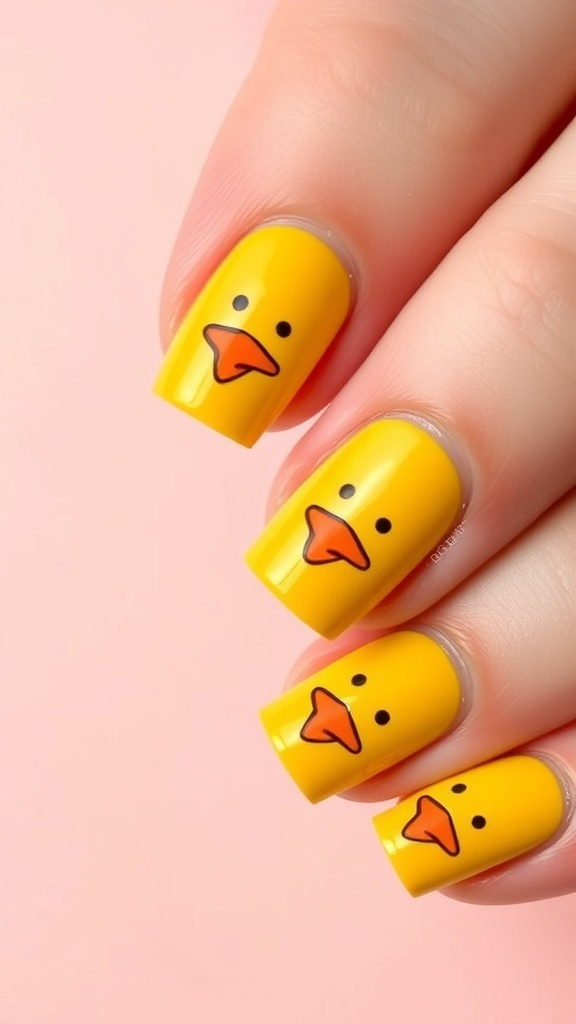
This duck nail art features a bright yellow base with hand-painted duck faces on accent nails. The design is easy to follow and can be completed in about 45 minutes, making it a great choice for both beginners and experienced nail art enthusiasts.
Ingredients
- Base coat
- Yellow nail polish
- White nail polish
- Black nail polish
- Orange nail polish
- Top coat
- Nail art brush or dotting tool
- Nail polish remover for cleanup
Instructions
- Prep Your Nails: Start with clean, dry nails. Apply a base coat to protect your natural nails.
- Apply Base Color: Paint all nails with yellow nail polish and let it dry completely.
- Create Duck Faces: On the accent nails, use a nail art brush or dotting tool to create white circles for the duck’s eyes. Add black dots for pupils and an orange triangle for the beak.
- Add Details: Once the duck faces are dry, you can add additional details like tiny wings or water ripples using a fine brush.
- Seal the Design: Finish with a top coat to protect your nail art and add shine.
- Cleanup: Use nail polish remover to clean up any mistakes around the cuticles.
Cook and Prep Times
- Prep Time: 10 minutes
- Nail Art Time: 35 minutes
- Total Time: 45 minutes
- Servings: 1 set of nails
- Calories: N/A
Related
- Duck-Themed Nail Art Design
- Pink Duck Nail Art Design
- Cute Duck Nail Art Design
- Duck Nail Art Design