Egg embroidery is a creative and unique craft that involves decorating eggshells with intricate designs using embroidery techniques. This art form can be a delightful way to celebrate holidays or create beautiful decorative pieces.
The process typically requires basic embroidery skills and materials such as eggs, embroidery thread, and needles. You can customize your designs to suit any occasion or personal style.
Understanding Egg Embroidery
Egg embroidery is a captivating craft that transforms ordinary eggs into stunning decorative pieces.
This art form combines traditional embroidery techniques with the delicate surface of eggshells, allowing for intricate designs that can brighten any space.
Whether for holidays or simply as a creative outlet, this craft offers a unique way to express artistic flair.
With just a few materials and some basic skills, anyone can create beautiful embroidered eggs that showcase their personal style.
Creative Egg Embroidery Ideas
The beauty of egg embroidery lies in its versatility.
From simple geometric patterns to elaborate floral motifs, the possibilities are endless.
This craft can be adapted for various occasions, making it suitable for Easter celebrations or springtime decor.
Both raw and blown eggs can be used, allowing for a range of projects.
Families and individuals alike can enjoy this craft, making it a perfect group activity or a peaceful solo endeavor.
Essential Materials for Egg Embroidery
To embark on your egg embroidery journey, gather the necessary materials.
You will need eggs—either raw or blown—along with colorful embroidery threads and a suitable needle.
Scissors and a water-soluble pen will help you mark your designs, while fabric stabilizer can be an optional addition for those seeking extra support.
Having these items at hand will set the stage for a delightful crafting experience.
With the right tools, you can bring your creative visions to life on the delicate canvas of an egg.
Step-by-Step Embroidery Process
Begin your project by preparing the egg.
If using raw eggs, carefully blow out the contents and ensure the shell is clean.
For blown eggs, make sure they are dry and ready for decoration.
Next, sketch your design using a water-soluble pen.
This step allows you to visualize your pattern before stitching begins.
Once your design is ready, thread your needle with a length of embroidery thread, tying a knot at the end.
Stitching Techniques to Enhance Your Design
With your needle threaded, start embroidering along the marked design.
Basic stitches such as backstitch, satin stitch, and French knots can add texture and depth to your work.
Feel free to experiment with different stitches to create unique effects.
Once your design is complete, secure the thread and trim any excess.
If you used a stabilizer, gently rinse the egg to remove any markings, revealing your beautiful embroidery.
Displaying Your Embroidered Egg
The final step is showcasing your masterpiece.
Place the embroidered egg in a decorative holder or arrange it in a basket with other spring flowers and greenery.
This presentation can enhance the festive atmosphere and bring a cheerful touch to your decor.
Embroidered eggs not only serve as stunning decorations but also as cherished keepsakes that celebrate creativity and craftsmanship.
Enjoy the process and let your imagination shine through each stitch!
Creative Egg Embroidery Ideas
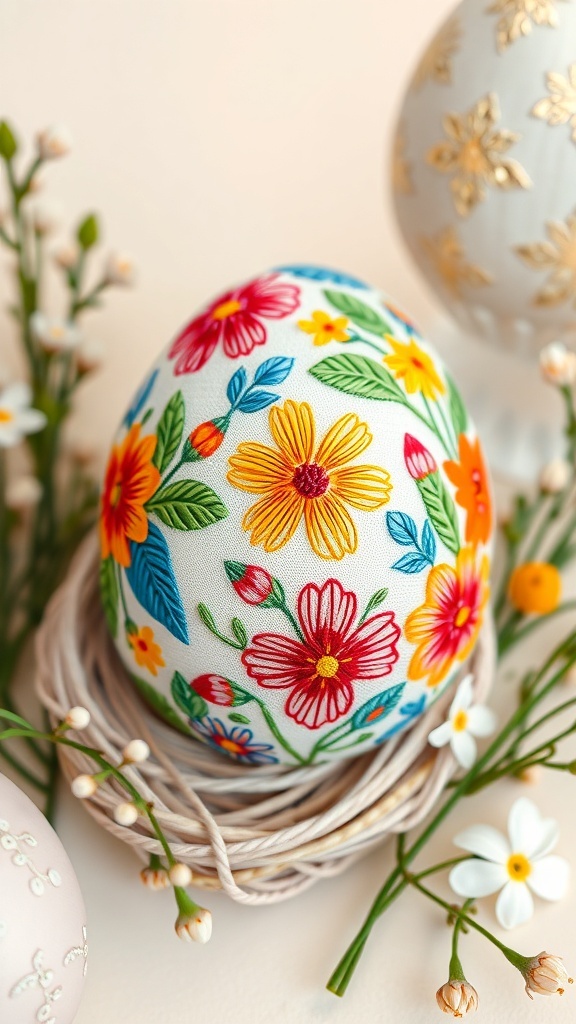
Egg embroidery allows for a variety of designs ranging from simple patterns to complex motifs. The technique can be applied to both raw and blown eggs, making it versatile for different projects. This craft is suitable for all skill levels and can be a fun activity for families or individuals.
Ingredients
Related
- Lobster Embroidery Patterns and Techniques
- Duck Embroidery Patterns and Techniques
- Buttercream Embroidery Techniques
- 5 Easy DIY Haircut Techniques You Can Try at Home