This festive nail art features a stunning combination of red polish and glitter, perfect for the holiday season. The addition of delicate snowflake designs adds a seasonal touch that will make your nails stand out at any Christmas gathering.
The process is simple and can be done at home with basic nail art supplies. You can customize the design with different shades of red and glitter to match your holiday outfits.
Festive Nail Art Inspiration
Transform your nails into a festive masterpiece with a vibrant red polish adorned with sparkling glitter. This eye-catching combination is perfect for holiday celebrations, ensuring your nails are the center of attention.
The intricate white snowflake designs add a seasonal flair, making these nails not just a beauty statement but also a celebration of the Christmas spirit. Whether you’re attending a holiday party or simply want to feel festive, these nails will elevate your look.
Essential Tools and Materials
To achieve this stunning nail art, gather the necessary supplies. Start with a quality red nail polish and a clear top coat to seal your design.
You’ll also need fine glitter, which can be silver or gold, to enhance the sparkle. A nail art brush or dotting tool will help you create those delicate snowflake patterns, while white nail polish is essential for the designs themselves. Don’t forget a nail file and buffer for prepping your nails, along with a base coat to protect them.
Preparation Steps
Begin your nail art journey by prepping your nails. File and buff them to create a smooth surface, which is crucial for a flawless finish.
Applying a base coat is important as it protects your natural nails from staining and helps the polish adhere better. Allow this base layer to dry completely before moving on to the color.
Applying the Red Polish
Once your base coat is dry, it’s time to apply the red nail polish. Two coats are recommended for a vibrant look, ensuring that each layer dries completely before adding the next.
This step is where the magic begins, as the rich red hue sets the festive tone for your nail art. Make sure to cover the entire nail for an even finish.
Adding Sparkle and Snowflakes
While the second coat of red polish is still wet, sprinkle fine glitter over your nails. This will create a dazzling effect that catches the light beautifully.
After the glitter is applied, allow it to set before moving on to the snowflake designs. Using a nail art brush or dotting tool, dip into the white polish and carefully draw snowflakes on each nail. Simple designs with lines and dots can create stunning results.
Finishing Touches
Once your snowflakes are dry, seal your artwork with a clear top coat. This not only adds shine but also protects your design from chipping.
Allow the top coat to dry completely before showcasing your festive nails. With this simple process, you can achieve a stunning holiday look that’s sure to impress.
Step-by-Step Guide to Festive Red Christmas Nails
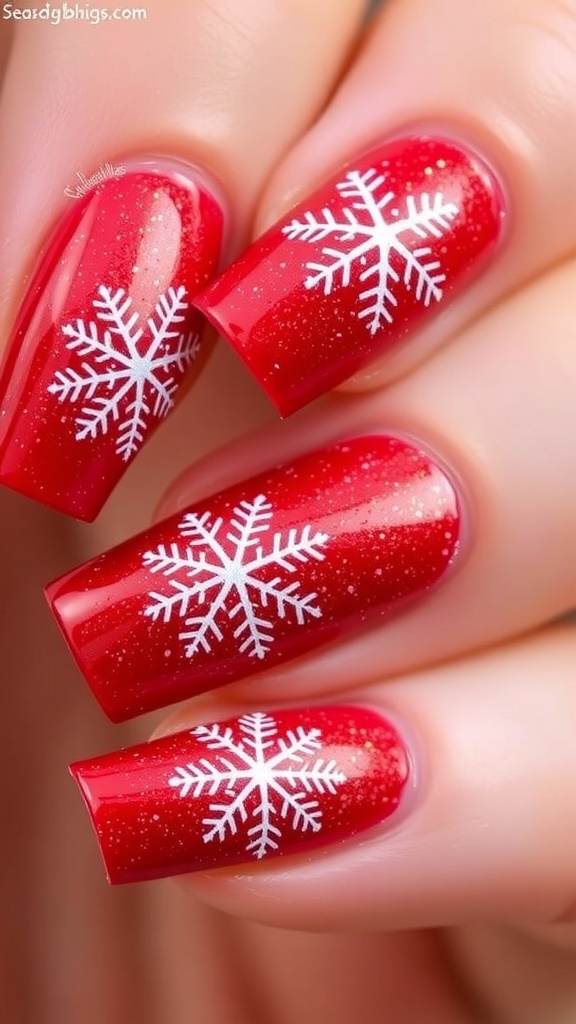
These glittery red Christmas nails are adorned with beautiful snowflake patterns, making them the ideal accessory for your holiday celebrations. The entire process takes about 30-40 minutes and is suitable for all skill levels.
Ingredients
- Red nail polish
- Clear top coat
- Fine glitter (silver or gold)
- Nail art brush or dotting tool
- White nail polish for snowflakes
- Nail file and buffer
- Base coat
Instructions
- Prep Your Nails: Start by filing and buffing your nails to create a smooth surface. Apply a base coat to protect your natural nails.
- Apply Red Polish: Once the base coat is dry, apply two coats of red nail polish, allowing each coat to dry completely.
- Add Glitter: While the second coat of red polish is still wet, sprinkle fine glitter over the nails to create a sparkling effect. Tap off any excess glitter.
- Create Snowflakes: Using a nail art brush or dotting tool, dip into white nail polish and carefully draw snowflake designs on each nail. You can create simple snowflakes with lines and dots.
- Seal the Design: After the snowflakes have dried, apply a clear top coat to seal the design and add shine.
- Final Touch: Allow the top coat to dry completely before showing off your festive nails.
Cook and Prep Times
- Prep Time: 10 minutes
- Nail Art Time: 30 minutes
- Total Time: 40 minutes
- Servings: 1 set of nails
- Calories: 0kcal
Related
- Deliciously Sweet Dessert Nails Design
- Butter Yellow Chrome Nails Design
- Red Almond Christmas Nails Design
- Festive Red Christmas Nails with Bow Design