This fun and creative project involves making a miniature bread keychain that can be a charming accessory or a unique gift. Using simple materials, you can create a realistic-looking bread piece that adds a touch of whimsy to your keys or bag.
The crafting process is straightforward and suitable for both beginners and experienced crafters. You can customize the design to resemble your favorite type of bread.
Creating Your Miniature Bread Keychain
Crafting a miniature bread keychain is a delightful project that combines creativity and skill. This charming accessory not only serves as a keyring but also showcases your artistic flair.
With just a few materials and some time, you can create a realistic loaf of bread that adds a personal touch to your everyday items.
Whether you’re a beginner or an experienced crafter, this project is perfect for anyone looking to explore their crafting abilities.
Materials Needed
To get started, gather the necessary materials. You will need polymer clay in various colors, such as brown and beige, to mimic the look of real bread.
A keychain ring is essential for attaching your creation, while super glue or a strong adhesive will secure the ring to the bread piece.
Having a craft knife or blade on hand will help you shape and detail your bread, and don’t forget a baking sheet and an oven to harden the clay. Optionally, sandpaper can be used to smooth any rough edges for a polished finish.
Step-by-Step Crafting Process
The crafting process is straightforward and can be completed in about an hour. Start by conditioning the polymer clay until it is soft and pliable, making it easier to work with.
Next, shape the clay into a loaf form or your preferred type of bread. Use the craft knife to add texture, creating realistic details that mimic the surface of actual bread.
Once you’re satisfied with the shape and texture, place the bread on a baking sheet and follow the manufacturer’s instructions to bake it until hardened.
Assembling the Keychain
After the bread has cooled, it’s time to assemble your keychain. Use super glue to attach the keychain ring to the top of the bread piece securely.
Make sure the glue is applied evenly for a strong bond.
If you wish, take the time to use sandpaper to smooth out any rough edges, enhancing the overall appearance of your keychain.
Personalizing Your Keychain
One of the best aspects of this project is the ability to customize your miniature bread keychain.
You can choose different colors and shapes to represent your favorite types of bread, such as baguettes or rolls.
This personalization not only makes your keychain unique but also allows you to express your style and preferences.
Showcasing Your Creation
Once completed, your miniature bread keychain can be a charming accessory for your keys, bag, or even as a gift for someone special.
Its realistic textures and colors will surely catch the eye and spark conversations.
Display your craftsmanship proudly, knowing that you created something truly unique and delightful.
DIY Miniature Bread Keychain
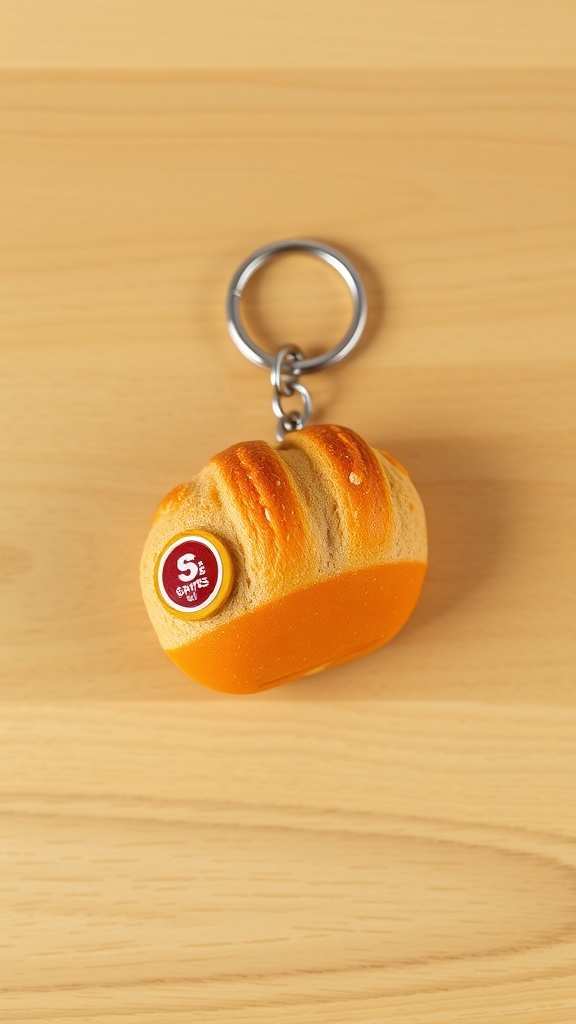
This miniature bread keychain is made using polymer clay, which allows for detailed designs and vibrant colors. The project typically takes about 1 hour to complete and results in a delightful keychain that showcases your crafting skills.
Ingredients
Related
- Miniature Taco Keychain Crafting Tutorial
- Cute and Easy Lobster Keychain Craft
- DIY Egg Keychain Craft
- Colorful Bean Keychain Craft