This festive nail art design features a striking red base with encapsulated elements, perfect for celebrating the holiday season. The encapsulation technique allows for creative layering of glitter, sequins, or other decorative items within a clear top layer, giving your nails a unique and eye-catching look.
The process is straightforward and can be done at home with the right tools and materials. You can customize the encapsulated elements to match your personal style or the theme of your holiday celebrations.
Festive Red Encapsulated Nail Art
This nail art design features a striking red polish that embodies the essence of the holiday season. The encapsulation technique allows for creative layering of glitter and sequins, resulting in a stunning visual effect.
The vibrant red base serves as a perfect canvas for the encapsulated elements, creating a festive and eye-catching look. With the right tools, this design can be achieved at home, making it accessible for anyone looking to add a touch of holiday spirit to their nails.
Preparation and Tools Needed
To get started, gather all necessary materials. You will need red nail polish, clear nail polish or gel, a nail art brush, and your choice of glitter or sequins for encapsulation.
Additionally, a nail file, base coat, top coat, and a UV/LED lamp (if using gel polish) are essential for achieving the best results. Preparing your nails by filing and cleaning the surface is crucial for optimal adhesion and a polished finish.
Application Process
The application process typically takes about 1-2 hours, depending on your experience level and the complexity of the design. Start by applying a base coat to protect your nails and enhance the adhesion of the polish.
Once the base coat is dry, apply two coats of red nail polish, allowing each coat to dry thoroughly. This vibrant color will be the foundation for the encapsulated elements.
Encapsulating Glitter and Sequins
While the red polish is still tacky, use a nail art brush to strategically place glitter or sequins on the nail. Gently press them into the polish to ensure they adhere well.
After positioning your decorations, seal the design with a layer of clear nail polish or gel. If using gel, make sure to cure it under a UV/LED lamp according to the product instructions for a long-lasting finish.
Finishing Touches
Once the encapsulated elements are secure, apply a top coat to enhance shine and provide additional protection. Allow it to dry completely for the best results.
Finally, clean up any excess polish around the cuticles with a brush dipped in nail polish remover. This step ensures a neat and professional-looking finish.
Showcasing Your Festive Nails
Once your nails are complete, they will be a vibrant representation of the holiday spirit. The glossy finish and encapsulated decorations will catch the light beautifully, making them a perfect accessory for any festive occasion.
Whether you’re attending a holiday party or simply celebrating at home, these nails will surely make a statement. Enjoy the compliments and festive cheer that come with your stunning nail art!
Festive Red Encapsulated Nail Art
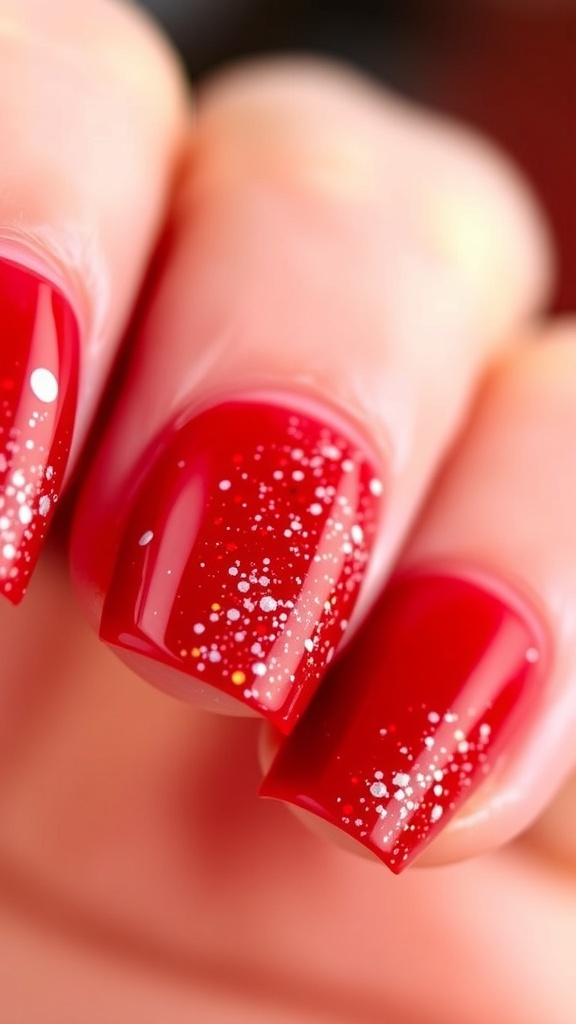
This nail art design combines a vibrant red polish with encapsulated decorations for a stunning holiday effect. The application process typically takes about 1-2 hours, depending on the complexity of the design and your experience level.
Ingredients
- Red nail polish
- Clear nail polish or gel
- Nail art brush
- Glitter or sequins for encapsulation
- Nail file
- Base coat
- Top coat
- UV/LED lamp (if using gel polish)
Instructions
- Prepare Your Nails: Start by filing and shaping your nails to your desired length and shape. Clean the nail surface to remove any oils.
- Apply Base Coat: Apply a base coat to protect your nails and enhance polish adhesion. Allow it to dry completely.
- Paint Red Polish: Apply two coats of red nail polish, allowing each coat to dry before applying the next.
- Add Encapsulation: While the red polish is still tacky, use a nail art brush to place glitter or sequins on the nail. Gently press them into the polish.
- Seal with Clear Polish: Once the encapsulated elements are in place, apply a layer of clear nail polish or gel over the entire nail to encapsulate the decorations. If using gel, cure under a UV/LED lamp as per the product instructions.
- Finish with Top Coat: After the clear layer is dry, apply a top coat for added shine and protection. Allow it to dry completely.
- Clean Up: Use a brush dipped in nail polish remover to clean any excess polish around the cuticles.
Cook and Prep Times
- Prep Time: 15 minutes
- Nail Art Time: 1-2 hours
- Total Time: 1-2 hours 15 minutes
Related
- Why do straight guys paint their nails?
- Why are Guys Painting their nails 2023?
- What do orange nails mean?
- What Happens If You Cut Your Dogs Nails Too Short?