This guide provides easy steps to achieve beautiful red nails perfect for the Christmas holidays. Red nails are a classic choice that adds a festive touch to any holiday outfit.
The process is straightforward and requires minimal tools, making it accessible for anyone looking to enhance their holiday look.
Creating the Perfect Festive Look
Red nails are a timeless choice, especially during the holiday season. They embody the spirit of Christmas, adding a vibrant touch to any outfit.
Whether you’re attending a festive gathering or simply want to feel festive at home, beautifully manicured red nails can elevate your look.
With just a few simple steps, you can achieve a polished and eye-catching manicure that complements the holiday decorations around you.
Essential Tools for Your Manicure
Before diving into the application process, gather your tools.
You will need red nail polish, a base coat, a top coat, a nail file, a cuticle pusher, and some cotton balls or pads for cleanup.
Having everything ready will make your manicure experience smoother and more enjoyable.
Step-by-Step Nail Preparation
Start by prepping your nails.
Remove any old polish and file your nails to your desired shape. This sets the foundation for a clean and beautiful manicure.
Next, gently push back your cuticles with a cuticle pusher for a neat appearance.
Applying the Base and Color
Once your nails are prepped, apply a thin layer of base coat.
This step is essential as it protects your nails and helps the polish adhere better.
After the base coat dries, it’s time for the red polish.
Apply two thin coats, allowing each to dry in between for a smooth finish.
Finishing Touches for a Glossy Look
After your red polish is completely dry, seal the deal with a top coat.
This adds shine and prolongs the wear of your manicure, ensuring your nails look fabulous throughout the holiday season.
For any minor mistakes around the edges, use a cotton ball or pad with nail polish remover for a clean finish.
Embracing the Holiday Spirit
With your vibrant red nails complete, you’re ready to embrace the festive spirit.
These nails not only enhance your holiday attire but also reflect the joy and cheer of the season.
As you admire your handiwork, you’ll feel a sense of accomplishment and readiness to celebrate.
Quick and Easy Red Nail Tutorial
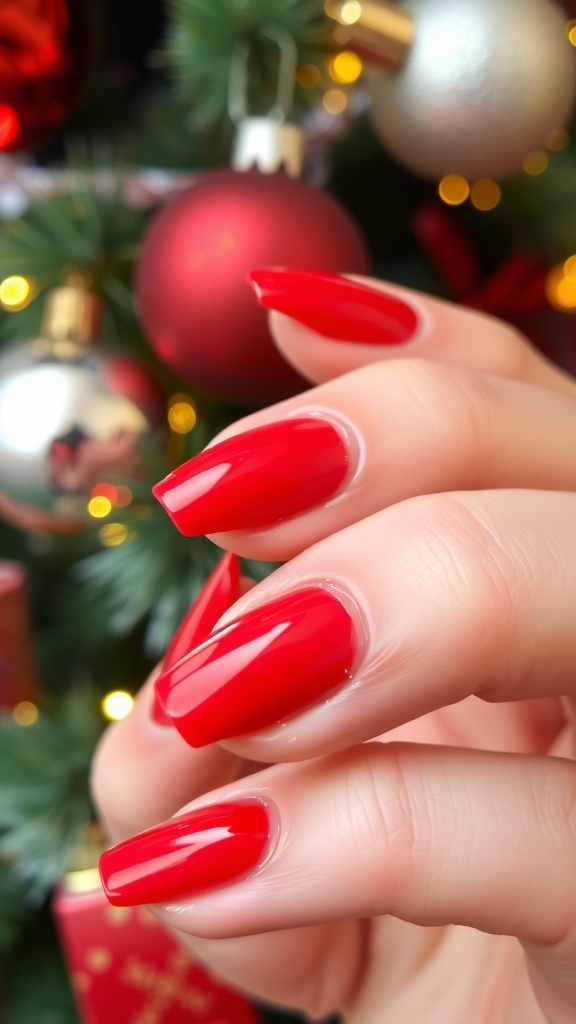
This simple red nail tutorial will help you achieve a polished and festive look in no time. The process takes about 30 minutes and is suitable for all skill levels.
Ingredients
- Red nail polish
- Base coat
- Top coat
- Nail file
- Cuticle pusher
- Cotton balls or pads
- Nail polish remover
Instructions
- Prep Your Nails: Start by removing any old nail polish and filing your nails to your desired shape.
- Push Back Cuticles: Use a cuticle pusher to gently push back your cuticles for a clean look.
- Apply Base Coat: Apply a thin layer of base coat to protect your nails and help the polish adhere better.
- Apply Red Nail Polish: Once the base coat is dry, apply two thin coats of red nail polish, allowing each coat to dry in between.
- Finish with Top Coat: After the red polish is dry, apply a top coat to add shine and prolong the wear of your manicure.
- Clean Up: Use a cotton ball or pad with nail polish remover to clean up any mistakes around the edges.
Cook and Prep Times
- Prep Time: 10 minutes
- Application Time: 20 minutes
- Total Time: 30 minutes
- Servings: 1 manicure
- Calories: 0 kcal
Related
- What holidays do you get paid extra at amazon?
- What holidays does amazon shut down for?
- What Federal Holidays Do Military Get Off?
- 5 Creative Ways to Repurpose Your Christmas Tree After the Holidays