This yogurt bread recipe is a simple and delicious way to make soft, fluffy bread using a bread maker. The addition of yogurt enhances the texture and flavor, making it a delightful choice for sandwiches or toast.
The recipe is easy to follow and requires minimal ingredients, perfect for both beginners and experienced bakers.
Understanding Yogurt Bread
Yogurt bread is a delightful option for those who appreciate a soft, fluffy texture in their baked goods. The incorporation of yogurt not only enhances the flavor but also contributes to the bread’s lightness. This recipe is straightforward, making it accessible for bakers of all skill levels.
The simplicity of the ingredients used in yogurt bread is part of its charm. With just a few pantry staples, you can create a loaf that is perfect for sandwiches, toast, or simply enjoyed on its own. The process of making this bread is efficient, allowing you to have freshly baked bread ready in just a few hours.
Key Ingredients
The main components of yogurt bread include plain yogurt, flour, yeast, and a few additional ingredients like sugar and olive oil. Each element plays a vital role in achieving the desired texture and taste.
Yogurt serves as the star ingredient, providing moisture and a subtle tang. The flour forms the structure, while the yeast is responsible for the rise. Sugar and salt enhance the overall flavor, and olive oil or melted butter adds richness to the loaf.
Preparation Steps
Making yogurt bread in a bread maker is a hassle-free process. Start by combining the yogurt, warm water, sugar, salt, and olive oil in the bread maker pan. Mixing these ingredients ensures a well-blended base for the bread.
Next, gradually add the bread flour, ensuring it covers the liquid mixture completely. This step is crucial for proper mixing and rising. Finally, create a small well in the flour to add the active dry yeast, which will activate during the bread-making cycle.
Baking Process
Once the ingredients are prepared, place the pan in the bread maker and select the appropriate settings. Choosing the ‘Basic’ or ‘White Bread’ option will yield the best results. Adjust the crust color preference according to your liking.
Start the machine and let it work its magic. The bread maker will handle the mixing, kneading, and baking, allowing you to focus on other tasks or simply relax while the aroma of freshly baked bread fills your kitchen.
Cooling and Slicing
After the baking cycle is complete, carefully remove the bread from the pan. Allow it to cool on a wire rack to prevent moisture buildup, which can affect the texture.
Once cooled, slice the bread to reveal its soft, fluffy interior. Each slice showcases the light texture that makes yogurt bread so appealing. Enjoy it fresh or store it for later use, knowing you have a delicious homemade loaf on hand.
Serving Suggestions
Yogurt bread is versatile and can be served in various ways. It pairs wonderfully with spreads like butter, jam, or cream cheese. For a heartier option, use it for sandwiches filled with your favorite ingredients.
This bread can also be toasted for breakfast or served alongside soups and salads. Its mild flavor complements a wide range of dishes, making it a staple in any kitchen.
Easy Yogurt Bread in a Bread Maker
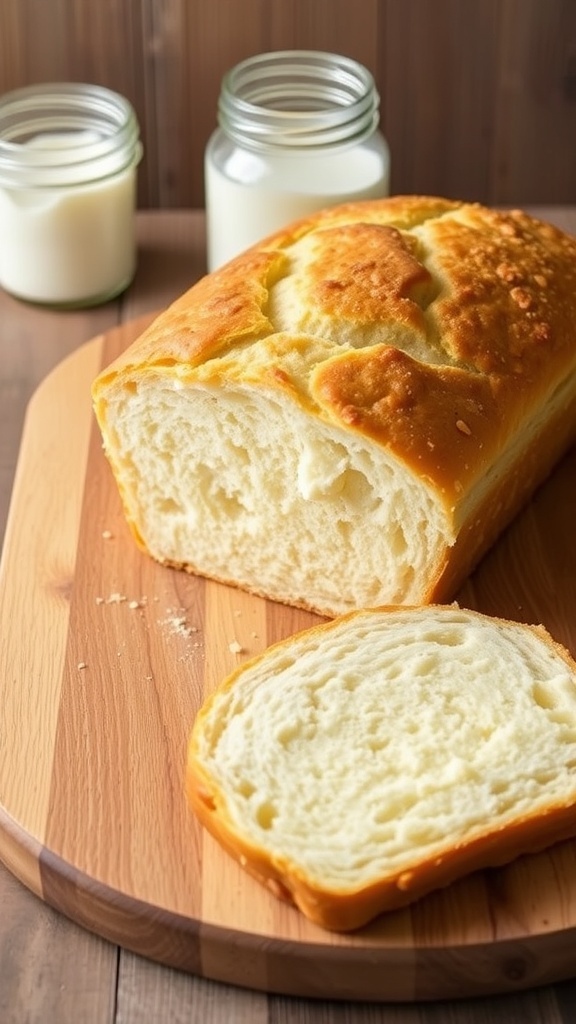
This yogurt bread is made with yogurt, flour, yeast, and a few other pantry staples. It takes about 3 hours from start to finish in a bread maker and yields a loaf that serves 8 slices.
Ingredients
- 1 cup plain yogurt
- 1/4 cup warm water
- 2 tablespoons sugar
- 1 teaspoon salt
- 2 tablespoons olive oil or melted butter
- 3 cups bread flour
- 2 teaspoons active dry yeast
Instructions
- Add Ingredients: In the bread maker pan, combine the yogurt, warm water, sugar, salt, and olive oil. Mix well.
- Add Flour: Gradually add the bread flour on top of the liquid mixture, ensuring it covers the liquid completely.
- Add Yeast: Make a small well in the center of the flour and add the active dry yeast.
- Select Settings: Place the pan in the bread maker, select the ‘Basic’ or ‘White Bread’ setting, and set the crust color preference.
- Start the Machine: Start the bread maker and let it run through the entire cycle.
- Cool and Slice: Once the baking cycle is complete, carefully remove the bread from the pan and let it cool on a wire rack before slicing.
Cook and Prep Times
- Prep Time: 10 minutes
- Cook Time: 2 hours 30 minutes
- Total Time: 2 hours 40 minutes
- Servings: 8 slices
- Calories: 150kcal
- Fat: 4g
- Protein: 5g
- Carbohydrates: 24g
Related
- Homemade Artisan Bread Maker Recipe
- Simple and Delicious Bread Maker Recipes
- Versatile Rice Maker Chicken and Vegetable Recipe
- Delicious Homemade Pasta Recipe Using a Pasta Maker