Capturing the beauty of bread through photography can elevate your culinary presentations and showcase the artistry of baking. This guide provides practical tips and techniques for photographing bread to highlight its texture, color, and shape.
Whether you’re a food blogger, a baker, or simply someone who enjoys sharing their creations, these techniques will help you take stunning bread photos that entice viewers.
Choosing the Right Bread
Selecting a variety of freshly baked bread is the first step in creating a captivating scene. Consider including a crusty sourdough loaf, a golden baguette, and rustic rolls to showcase different textures and shapes.
Each type of bread brings its own unique character to the composition. The sourdough, with its artisanal crust, contrasts beautifully with the smooth surface of the baguette. The rustic rolls add a touch of warmth and homeliness to the arrangement.
Setting Up Your Scene
Finding the perfect location is crucial for capturing stunning bread photography. Look for a spot with ample natural light, such as near a window where soft, diffused sunlight can illuminate your setup.
Arrange your props thoughtfully. A wooden cutting board serves as an excellent base, enhancing the rustic feel of the scene. Incorporate a linen napkin and a vintage knife to add depth and interest, creating an inviting atmosphere that draws the viewer in.
Composition Techniques
Effective composition can make or break your bread photography. Utilize the rule of thirds by positioning the bread off-center, which adds dynamism to your images.
Experiment with different angles to find the most flattering perspective. Overhead shots can provide a comprehensive view, while eye-level shots can create a more intimate connection with the viewer. Don’t hesitate to take multiple shots from various angles to capture the best representation of your bread.
Highlighting Texture
Close-up shots are essential for showcasing the intricate details of bread. Focus on the crust and crumb to highlight the unique textures that make each loaf special.
Using a shallow depth of field can help blur the background, drawing attention to the bread itself. This technique emphasizes the artisanal qualities of the loaves and creates a more visually appealing image.
Lighting Considerations
Lighting plays a pivotal role in food photography. Experiment with shooting at different times of the day to observe how the light affects your setup. Soft, diffused light is often the most flattering for food photography, enhancing the colors and textures of the bread.
Avoid harsh shadows by positioning your setup in a way that the light gently wraps around the bread. This technique will create a warm and inviting atmosphere, perfect for showcasing your baked goods.
Editing Your Photos
Post-processing can elevate your images to the next level. Utilize editing software to enhance colors, adjust brightness, and crop your photos for a polished final look.
Even minor adjustments can make a significant difference in how your bread photography is perceived. Aim for a natural look that maintains the authenticity of the bread while making it visually appealing to your audience.
Tips for Stunning Bread Photography
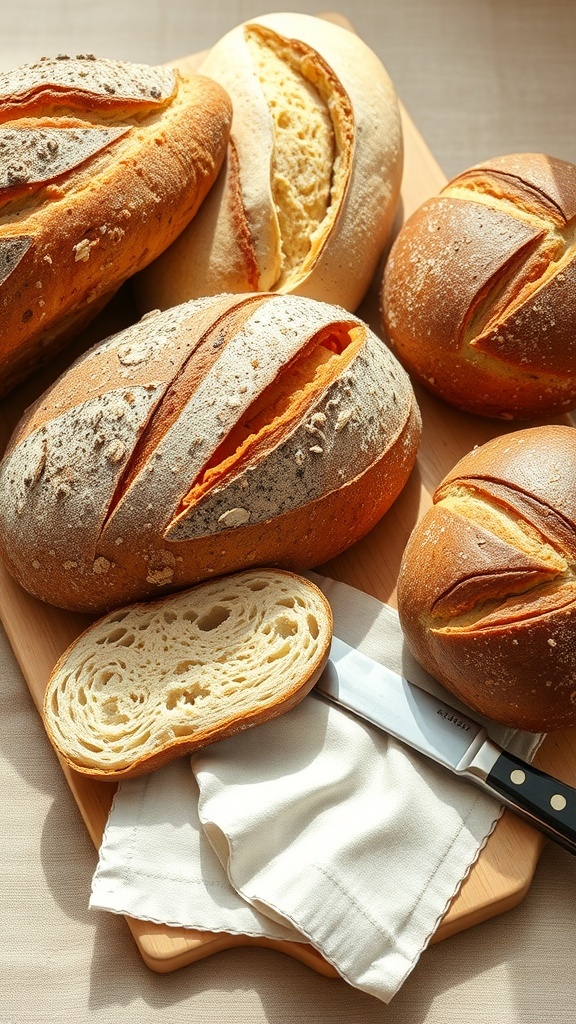
This guide covers essential aspects of bread photography, including lighting, composition, and styling. With a focus on using natural light and simple props, you can create visually appealing images that highlight the unique characteristics of different types of bread.
Ingredients
- Freshly baked bread (various types)
- Natural light source (window or outdoor)
- Simple props (cutting boards, cloth napkins, utensils)
- Camera or smartphone with a good camera
- Tripod (optional for stability)
- Editing software (optional for post-processing)
Instructions
- Choose Your Bread: Select a variety of freshly baked bread to photograph, such as sourdough, baguettes, or artisan loaves.
- Set Up Your Scene: Find a location with ample natural light. A window with indirect sunlight is ideal. Arrange your props to create an inviting scene.
- Focus on Composition: Use the rule of thirds to compose your shot. Place the bread off-center for a more dynamic image. Experiment with different angles, such as overhead or eye-level.
- Highlight Texture: Capture close-up shots to emphasize the crust and crumb of the bread. Use a shallow depth of field to blur the background and draw attention to the bread.
- Experiment with Lighting: Try shooting at different times of the day to see how the light changes. Soft, diffused light is often the most flattering for food photography.
- Edit Your Photos: Use editing software to enhance colors, adjust brightness, and crop your images for a polished final look.
Cook and Prep Times
- Prep Time: 15 minutes
- Shoot Time: 30 minutes
- Total Time: 45 minutes
- Servings: N/A
- Calories: N/A
- Fat: N/A
- Protein: N/A
- Carbohydrates: N/A
Related
- Artistic Plating Techniques for Culinary Presentation
- Captivating Lobster Photography Techniques
- Stunning Underwater Lobster Photography Techniques
- Captivating Egg Photography Techniques