This fun and creative nail art design features a playful duck theme with zebra stripes. Perfect for those looking to add a unique touch to their manicure, this design combines vibrant colors and patterns to create an eye-catching look.
The process is straightforward and can be done at home with basic nail art supplies. Customize the colors and patterns to match your personal style.
Overview of Duck Zebra Nail Art
This nail art design brings together a whimsical yellow duck and striking zebra stripes, creating a playful yet sophisticated look.
The combination of bright colors and bold patterns makes this design perfect for anyone wanting to express their artistic side.
Whether for a casual outing or a special event, this manicure is sure to turn heads and spark conversations.
Materials Needed
To achieve this vibrant nail art, gather the following supplies:
- Base coat
- Yellow nail polish for the duck
- Black and white nail polish for zebra stripes
- Top coat
- Nail art brush or striping tape
- Dotting tool or toothpick for detailing
Having the right tools on hand will make the process smoother and more enjoyable.
Preparation Steps
Start by prepping your nails to ensure a clean canvas for your artwork.
Begin with clean, filed nails and apply a base coat to protect them from staining.
Choosing a base color that complements your design can also enhance the overall look.
Creating the Zebra Stripes
Once your base coat is dry, it’s time to apply the base colors for your design.
For the zebra nails, paint them with a white polish, allowing it to dry completely.
Using a nail art brush or striping tape, carefully create bold black stripes across the white nails for that iconic zebra look.
Designing the Cute Duck
On the accent nail, it’s time to bring the cute yellow duck to life.
Using the yellow polish, paint the shape of the duck, adding details like eyes and a beak with a dotting tool or toothpick.
Feel free to get creative with the duck’s expression to add a personal touch!
Finishing Touches
Once all the designs are complete and dry, apply a top coat to seal everything in place.
This not only adds shine but also helps to protect your artwork from chipping.
With your vibrant duck and zebra nail art complete, you’re ready to show off your playful style!
Step-by-Step Duck Zebra Nail Art
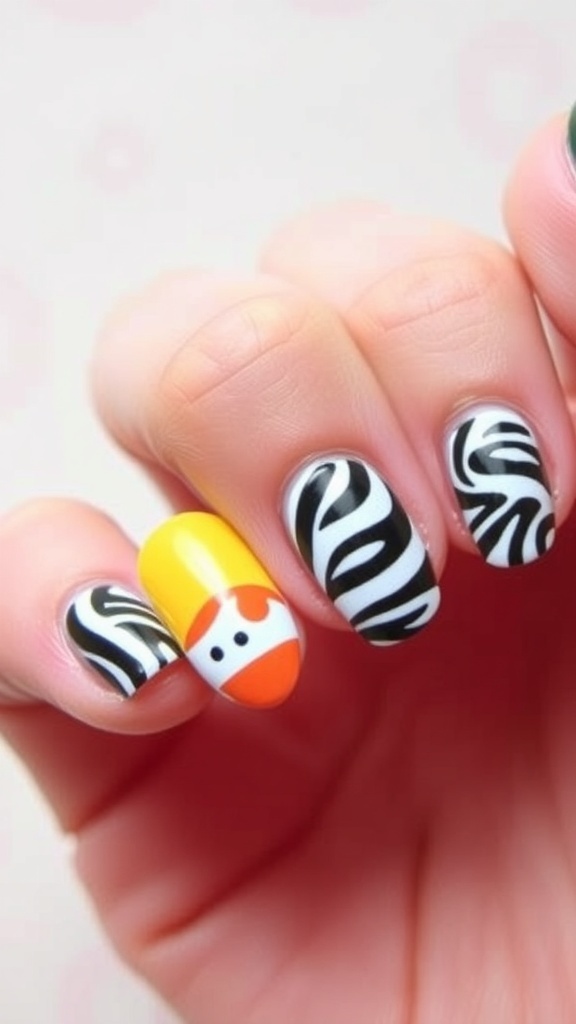
This nail art design showcases a cute duck accent nail paired with zebra-striped nails. The combination of bright yellow for the duck and bold black and white stripes creates a striking contrast. The design is suitable for any occasion and is sure to draw attention.
Ingredients
- Base coat
- Yellow nail polish for the duck
- Black and white nail polish for zebra stripes
- Top coat
- Nail art brush or striping tape
- Dotting tool or toothpick for details
Instructions
- Prep Your Nails: Start with clean, filed nails. Apply a base coat to protect your nails.
- Apply Base Colors: Paint all nails with a base color of your choice. For the duck nail, use yellow polish, and for the zebra nails, use white polish.
- Create Zebra Stripes: Once the white polish is dry, use a nail art brush or striping tape to create black zebra stripes on the white nails.
- Design the Duck: On the accent nail, use the yellow polish to create the shape of a duck. Add details like eyes and a beak using a dotting tool or toothpick.
- Finish with Top Coat: Once everything is dry, apply a top coat to seal your design and add shine.
Cook and Prep Times
- Prep Time: 10 minutes
- Nail Art Time: 30 minutes
- Total Time: 40 minutes
- Servings: 1 manicure
- Calories: N/A
Related
- Duck-Themed Nail Art Design
- Pink Duck Nail Art Design
- Cute Duck Nail Art Design
- Duck Nail Art Design