Get into the holiday spirit with this festive red and green Christmas nail art. This design combines the classic colors of the season, making your nails a perfect accessory for holiday gatherings and celebrations.
The tutorial is easy to follow and requires basic nail art supplies. You can customize the design with different patterns or add glitter for an extra festive touch.
Festive Vibes with Christmas Nail Art
Embrace the holiday cheer with a stunning Christmas nail art design that captures the essence of the season. A vibrant red base paired with intricate green designs creates a festive look that is sure to turn heads at any holiday gathering.
This nail art is not just about color; it’s an expression of creativity. The combination of red and green, classic symbols of Christmas, brings warmth and joy to your fingertips. Adding festive patterns like snowflakes and Christmas trees elevates the design, making it a perfect accessory for your holiday outfits.
Gather Your Supplies
Before diving into the nail art process, ensure you have all the necessary supplies at hand. A vibrant red nail polish serves as the base, while a green polish will be used for the intricate designs.
Other essentials include a base coat and a top coat to protect and seal your artwork. A nail art brush or dotting tool will help create those detailed patterns, and if you want to add a touch of sparkle, consider having some glitter polish on standby.
Step-by-Step Application
Start by prepping your nails. Clean and dry them thoroughly, then apply a base coat to protect your natural nails. This step is crucial for ensuring your nail art lasts through the festivities.
Next, paint all your nails with the vibrant red polish. Allow it to dry completely before moving on to the fun part—adding the green accents. Using a nail art brush or dotting tool, create festive designs like stripes, dots, or even miniature Christmas trees on a few selected nails.
Adding Sparkle and Shine
If you’re feeling extra festive, applying a layer of glitter polish over your green designs can add a beautiful sparkle that catches the light. This step is optional but can elevate your nail art to a whole new level of holiday glam.
Once you’re satisfied with your designs, finish off with a top coat. This not only seals in your artwork but also adds a glossy shine that enhances the overall look. Don’t forget to clean up any excess polish around your cuticles for a polished finish.
Creating the Perfect Holiday Setting
The beauty of this nail art is further enhanced by the cozy holiday atmosphere around you. Imagine twinkling lights and festive decorations setting the backdrop as you showcase your beautifully painted nails.
Consider taking a close-up photo of your nails against this charming setting. The combination of your vibrant red and green designs with the warm glow of holiday lights will create a stunning visual that captures the spirit of the season.
Celebrate Your Creativity
Completing this Christmas nail art is not just about the final look; it’s also about the joy of creating something special for the holidays. Whether you’re attending a festive gathering or simply enjoying the season at home, your nails can reflect the cheer and warmth of Christmas.
So gather your supplies, follow the steps, and let your creativity shine. This nail art is a delightful way to celebrate the holidays and express your festive spirit!
Step-by-Step Guide to Christmas Nail Art
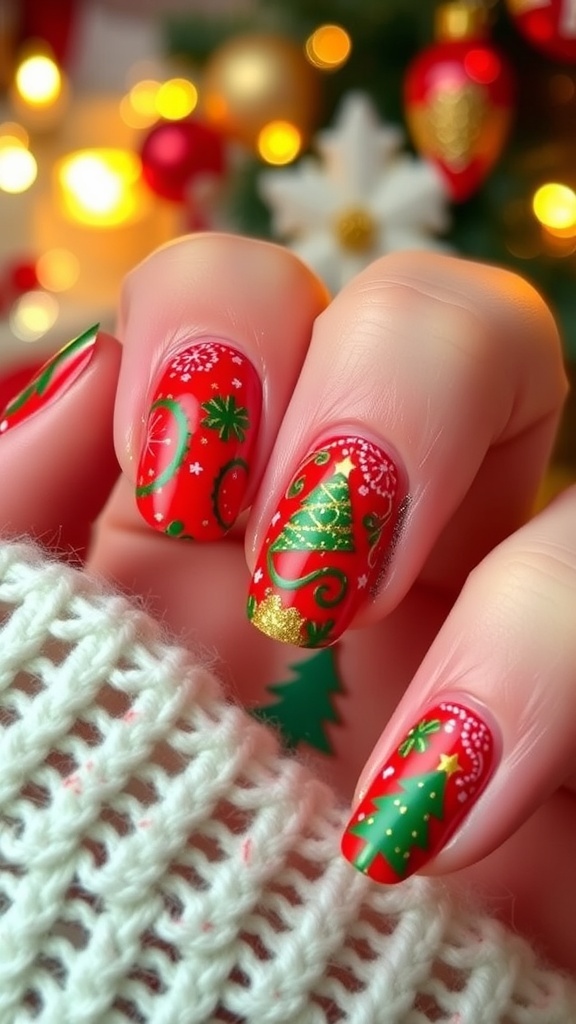
This Christmas nail art features a vibrant red base with green accents, perfect for celebrating the season. The design can be completed in about 30 minutes and is suitable for all skill levels.
Ingredients
- Red nail polish
- Green nail polish
- Base coat
- Top coat
- Nail art brush or dotting tool
- Nail tape (optional)
- Glitter (optional)
Instructions
- Prep Your Nails: Start with clean, dry nails. Apply a base coat to protect your nails and help the polish adhere better.
- Apply Base Color: Paint all your nails with the red nail polish. Allow it to dry completely.
- Create Green Accents: Use a nail art brush or dotting tool to add green designs, such as stripes, dots, or Christmas trees on a few nails.
- Add Glitter (Optional): If desired, apply a layer of glitter polish over the green accents for extra sparkle.
- Finish with Top Coat: Once your design is dry, apply a top coat to seal in your nail art and add shine.
- Clean Up: Use a small brush dipped in nail polish remover to clean up any excess polish around the cuticles.
Cook and Prep Times
- Prep Time: 5 minutes
- Nail Art Time: 25 minutes
- Total Time: 30 minutes
- Servings: 1 set of nails
- Calories: 0kcal
Related
- Emerald Green and Red Christmas Nail Art
- Festive Green and Red Christmas Nail Art
- 5 Funky Nail Art Designs to Try This Season
- 5 Stunning 3D Nail Art Designs to Try at Home