This festive nail art design features a vibrant red base with playful Grinch-themed accents, perfect for the holiday season. The combination of colors and designs captures the spirit of Christmas while adding a fun twist.
The tutorial is easy to follow and requires basic nail art skills. You can customize it with different shades or additional decorations to match your personal style.
Festive Nail Art Inspiration
Embrace the holiday spirit with vibrant nail art that captures the essence of Christmas.
The Grinch-themed designs add a playful twist to a classic red base, making your nails a festive statement.
This design is perfect for those looking to showcase their holiday cheer in a fun and creative way.
Materials Needed
To achieve this stunning look, gather the following supplies:
A bright red nail polish serves as the foundation, while green and white polishes bring the Grinch to life.
Nail art brushes or dotting tools will help you create intricate designs, and a top coat will provide that glossy finish.
Don’t forget a base coat for protection and a nail file to prep your nails!
Preparation Steps
Start by prepping your nails for a smooth canvas.
Filing and buffing will ensure your nails are ready for polish application.
Applying a base coat is essential to protect your natural nails and enhance the longevity of your nail art.
Creating the Base Color
Once your nails are prepped, it’s time to apply the vibrant red polish.
Paint each nail carefully, ensuring an even coat.
Allow the polish to dry completely before moving on to the fun part—adding the Grinch designs!
Designing the Grinch
Using the green polish, create whimsical Grinch faces or festive motifs on selected accent nails.
Precision is key, so a dotting tool or nail art brush will be your best friend here.
Let your creativity flow as you bring the Grinch to life with your unique touch!
Adding Festive Accents
Once the green designs are dry, it’s time to add the finishing touches.
Use white polish to create snowflakes or the Grinch’s signature fur details.
These accents will enhance the festive theme and make your nails truly stand out.
Sealing the Design
After your nail art is completely dry, apply a top coat to seal in your designs.
This step not only protects your artwork but also adds a beautiful shine.
Allow the top coat to dry fully before showing off your festive nails to friends and family!
Step-by-Step Grinch Christmas Nail Tutorial
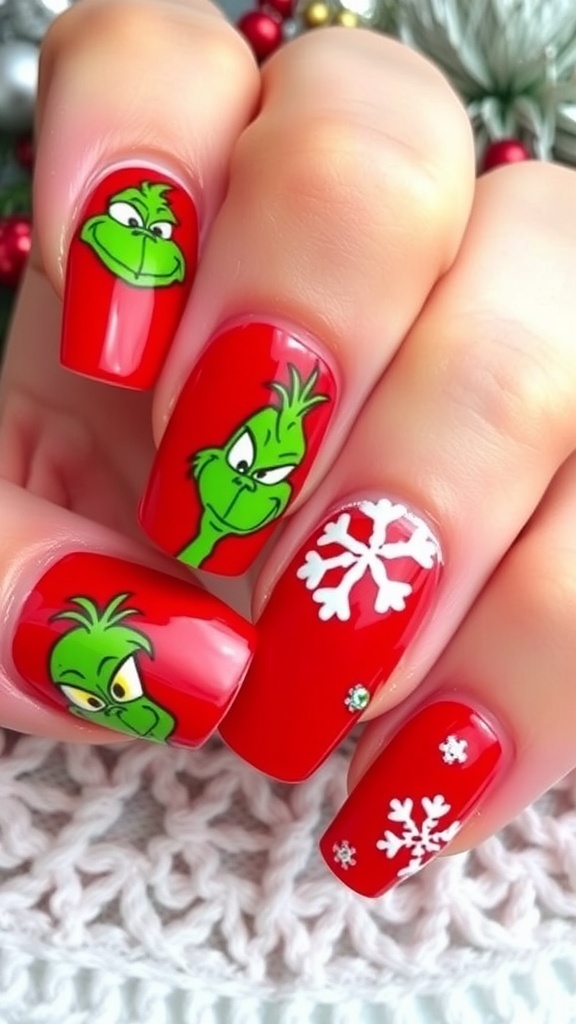
This nail art design showcases a bright red polish as the base, complemented by green and white details representing the Grinch. The design is suitable for all skill levels and can be completed in about an hour.
Ingredients
- Red nail polish
- Green nail polish
- White nail polish
- Nail art brushes or dotting tools
- Top coat for shine
- Nail file and buffer
- Base coat for protection
Instructions
- Prep Your Nails: Start by filing and buffing your nails for a smooth surface. Apply a base coat to protect your natural nails.
- Apply Base Color: Paint all your nails with the red nail polish and let it dry completely.
- Create Grinch Designs: Using the green polish, create small Grinch faces or Christmas-themed designs on a few accent nails. Use a dotting tool or nail art brush for precision.
- Add Details: Once the green polish is dry, use white polish to add accents like snowflakes or the Grinch’s signature fur.
- Seal the Design: After the nail art is completely dry, apply a top coat to protect your design and add shine.
- Final Touch: Allow the top coat to dry fully before showing off your festive nails.
Cook and Prep Times
- Prep Time: 10 minutes
- Nail Art Time: 40 minutes
- Total Time: 50 minutes
Related
- Duck-Inspired Zebra Print Nail Art
- 2000s Inspired Duck Nail Art
- 90’s Inspired Duck Nail Art
- Candy Cane Inspired Red Christmas Nail Art