Have you ever wanted to make your own yogurt at home? This homemade natural yogurt recipe is your answer. It’s an easy and rewarding process that results in creamy, tangy yogurt. Perfect for breakfast, snacks, or even cooking, you can customize it to suit your taste.
With just a few simple ingredients, you can create a delicious and healthy yogurt that rivals any store-bought version. Plus, it’s a great way to control sugar and additives – you’ll know exactly what’s going into your yogurt.
Making Your Own Yogurt at Home
Creating yogurt from scratch is a rewarding endeavor that showcases the beauty of simple ingredients. With just milk and yogurt cultures, you can produce a creamy treat that can be tailored to your preferences.
The process involves heating the milk and allowing it to cool before introducing yogurt culture. This straightforward approach empowers you to customize your yogurt’s texture and tanginess, ensuring it meets your taste.
The Benefits of Homemade Yogurt
Homemade yogurt offers an array of advantages. For starters, you have full control over the ingredients, minimizing unnecessary sugars and additives commonly found in store-bought options.
This yogurt is not only healthier but also incredibly versatile. You can enjoy it plain or enhance its flavor with fresh fruits, a drizzle of honey, or a sprinkle of granola, turning it into a delightful breakfast or snack.
Choosing the Right Ingredients
The foundation of yogurt is simple: high-quality milk and a yogurt starter containing live cultures. Whole milk yields the creamiest results, but you can opt for your preferred milk type.
For those who want a hint of sweetness, consider adding honey or sugar to taste. The choice of toppings can also elevate your yogurt experience, offering endless possibilities for flavor combinations.
Step-by-Step Process
Making yogurt requires a few key steps. Start by heating milk until it’s steaming, then allow it to cool to a warm temperature. This crucial step helps activate the live cultures.
Next, mix in your yogurt starter and let it incubate in a warm environment. The length of this process can vary based on how tangy you like your yogurt. Be patient as it transforms into a thick, velvety delight.
Enjoying Your Creation
Once your yogurt reaches the desired consistency, it’s time to chill it in the refrigerator. As it cools, it thickens further, enhancing its creaminess.
When ready to serve, present it with fresh fruits, a drizzle of honey, and a sprinkle of granola. This wholesome combination not only looks beautiful but also offers a satisfying mix of textures and flavors.
Storing and Utilizing Leftovers
Store any leftover yogurt in an airtight container in the fridge. Homemade yogurt can last up to two weeks, making it a convenient option for meal prep.
Incorporate yogurt into smoothies, salad dressings, or desserts for added creaminess and nutrition. The possibilities are limitless, allowing you to enjoy your homemade yogurt in various ways.
The Easiest Way to Make Natural Yogurt
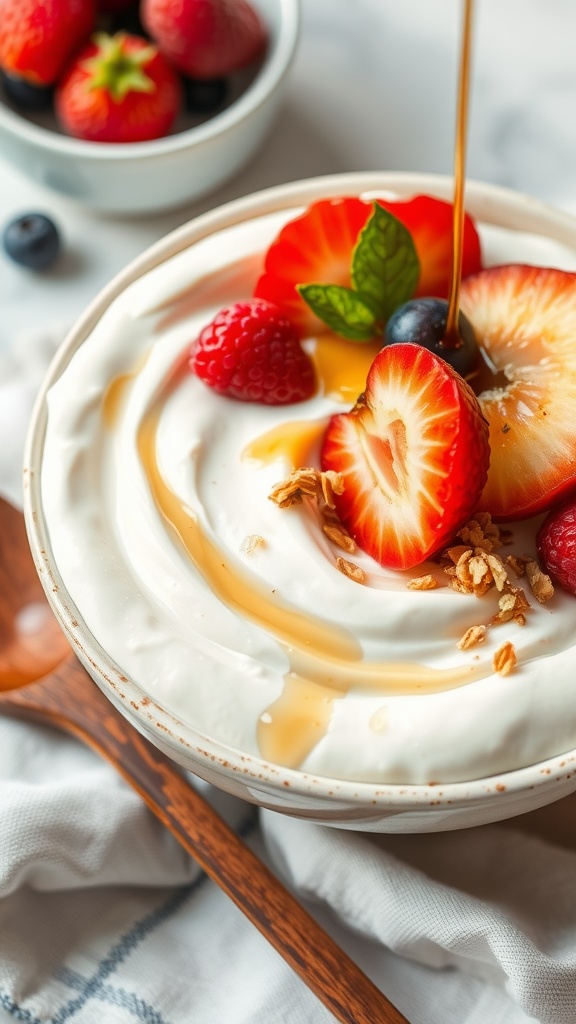
This natural yogurt is smooth, creamy, and has a pleasant tang that makes it perfect for enjoying plain or with your favorite toppings. You can add fruits, honey, or nuts for added texture and flavor.
Ingredients
- 4 cups whole milk (or any milk of your choice)
- 1/4 cup plain yogurt with live cultures
- Optional: sugar or honey to taste
Instructions
- Heat the Milk: In a saucepan, heat the milk over medium heat until it begins to steam. Do not let it boil.
- Cool the Milk: Remove the saucepan from heat and let the milk cool to about 110°F (43°C).
- Add Yogurt: Stir in the plain yogurt until well combined.
- Incubate: Pour the mixture into a clean container and cover it with a lid or cloth. Place it in a warm area (like an oven with the light on) for 4 to 12 hours, depending on how tangy you want your yogurt.
- Check Consistency: After the incubation period, check the yogurt. It should be thickened and have a tangy flavor. If it’s not thick enough, let it sit for a few more hours.
- Refrigerate: Once ready, transfer the yogurt to the refrigerator to chill. It will continue to thicken as it cools.
Cook and Prep Times
- Prep Time: 10 minutes
- Cook Time: 0 minutes
- Total Time: 4-12 hours (incubation time)
- Servings: 4 cups
- Calories: 100 kcal (per cup)
- Fat: 5g
- Protein: 8g
- Carbohydrates: 12g
Related
- Who are brad pitts natural kids?
- Can a Natural blonde have brown eyes?
- What are the 7 natural wonders of the world?
- Do Natural Black Eyes Exist?