This tutorial will guide you through creating stunning red Christmas dip nails, perfect for the festive season. Dip nails are known for their durability and vibrant color, making them a popular choice for holiday celebrations.
The process is straightforward and requires minimal tools. You can customize your red dip nails with glitter or festive designs to enhance the holiday spirit.
Creating the Perfect Red Christmas Dip Nails
Red Christmas dip nails are a stunning choice for the festive season, offering both durability and vibrancy. The glossy finish combined with subtle glitter accents creates an eye-catching look that is sure to impress at any holiday gathering.
This tutorial outlines a straightforward process that requires minimal tools. With just a few steps, you can achieve beautifully manicured nails that reflect the spirit of Christmas.
Essential Tools and Materials
Before starting, gather all necessary materials to ensure a smooth application process. You will need red dip powder, a base coat, an activator, and a top coat. Additional tools include a nail file, nail buffer, nail brush, cuticle pusher, and lint-free wipes.
Having everything ready will help streamline your experience, allowing you to focus on perfecting your nails.
Step-by-Step Application Process
Begin by prepping your nails. Clean them thoroughly and push back your cuticles to create a clean canvas. Use a nail file and buffer to smooth the surface, ensuring the dip powder adheres properly.
Next, apply a thin layer of base coat to each nail. This step is crucial as it helps the dip powder stick effectively, leading to a long-lasting finish.
Applying the Red Dip Powder
Once the base coat is dry, dip each nail into the red dip powder, ensuring full coverage. Tap off any excess powder gently to avoid clumping.
After dipping, apply the activator to each nail. This step sets the dip powder and allows it to dry properly. Wait a few minutes for it to harden before moving on to the next steps.
Finishing Touches
Once the nails are dry, file and shape them to your desired length and style. This is where you can personalize your look, making sure your nails are elegantly shaped.
Finish with a layer of top coat for added shine and protection. Allow it to dry completely to ensure a glossy finish that stands out.
Adding a Festive Flair
If you want to enhance your Christmas theme, consider adding glitter or festive designs. This optional step can elevate your nails, making them even more suitable for holiday celebrations.
With the right touches, your red dip nails will not only look beautiful but also reflect the cozy holiday spirit, especially when paired with a festive backdrop of twinkling lights and decorations.
Step-by-Step Red Christmas Dip Nails
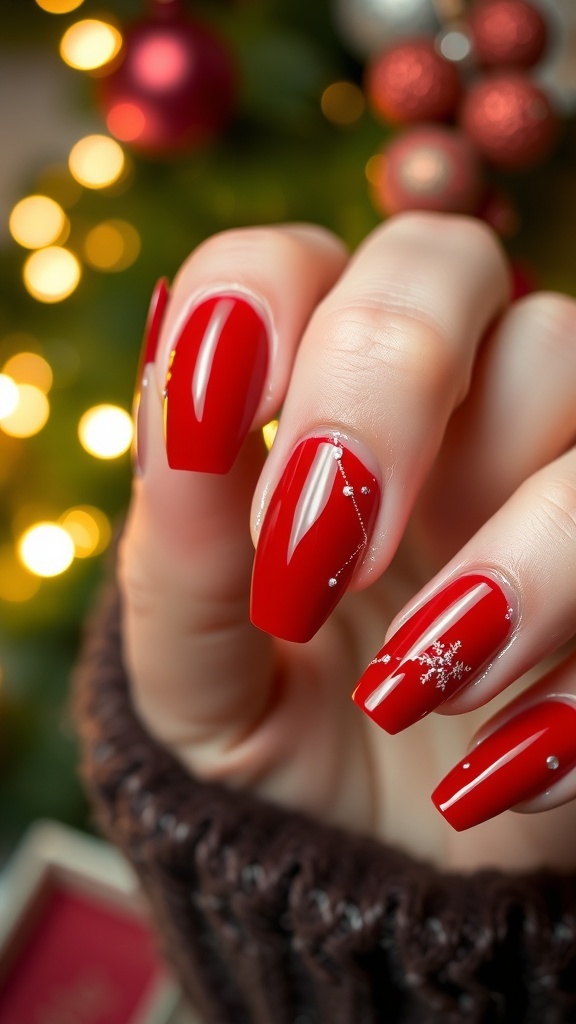
This dip nails tutorial provides a detailed approach to achieving a beautiful red finish. The process typically takes about 1-2 hours, depending on your experience level, and results in long-lasting, eye-catching nails.
Ingredients
- Red dip powder
- Base coat
- Activator
- Top coat
- Nail file
- Nail buffer
- Nail brush
- Cuticle pusher
- Lint-free wipes
Instructions
- Prep Your Nails: Start by cleaning your nails and pushing back your cuticles. File and buff your nails to create a smooth surface.
- Apply Base Coat: Apply a thin layer of base coat to each nail. This will help the dip powder adhere better.
- Dip in Red Powder: Dip each nail into the red dip powder, ensuring full coverage. Tap off any excess powder.
- Activate the Powder: Apply the activator to each nail to set the dip powder. Wait a few minutes for it to dry.
- File and Shape: Once dry, file and shape your nails to your desired length and style.
- Apply Top Coat: Finish with a layer of top coat for shine and protection. Allow it to dry completely.
- Optional: Add Glitter or Designs: If desired, you can add glitter or festive designs to enhance your Christmas theme.
Cook and Prep Times
- Prep Time: 15 minutes
- Application Time: 1 hour
- Total Time: 1 hour 15 minutes
Related
- Which is better for nails gel or dip?
- 5 Stunning Dip Nail Designs for Short Nails
- 5 Stunning Gel Dip Nail Powder Ideas for Short Nails
- Duck-Shaped Acrylic Nails Tutorial