This tutorial will guide you through the process of creating stylish duck-shaped acrylic nails. Duck nails are characterized by their unique shape, which resembles the webbed feet of a duck, making them a trendy choice for nail enthusiasts.
The application process involves basic nail techniques and materials, ensuring you can achieve this look at home or in a salon setting.
Understanding Duck-Shaped Acrylic Nails
Duck-shaped acrylic nails have gained popularity for their distinctive design, resembling the webbed feet of a duck. This unique shape offers a playful twist to traditional nail styles, making them a favorite among nail art enthusiasts.
The wide base and tapered tips create an eye-catching silhouette that stands out. These nails can be customized with various colors and finishes, allowing for personal expression and creativity.
Essential Tools and Materials
To achieve the perfect duck-shaped acrylic nails, gather the necessary tools. An acrylic nail kit is essential, which typically includes both powder and liquid components.
You’ll also need nail tips, preferably in stiletto or coffin shapes, to form the base of your design. Other important items include a nail file, buffer, nail primer, glue, cuticle oil, and a top coat for that glossy finish.
Preparing Your Natural Nails
Before applying acrylics, it’s crucial to prepare your natural nails properly. Start by cleaning your nails thoroughly and pushing back your cuticles to create a clean canvas.
Buffing the surface of your nails ensures that the acrylic adheres effectively, leading to a longer-lasting finish. This preparation step is vital for achieving a professional look.
Application Process
The application of duck-shaped acrylic nails involves several steps. Begin by selecting the right size nail tips and gluing them onto your natural nails. Trim them to your desired length, keeping in mind the unique duck shape.
Next, mix the acrylic powder and liquid according to the kit instructions. Using a brush, apply the mixture over the nail tips, building up the desired shape. This step requires some skill, so take your time to ensure an even application.
Shaping and Finishing Touches
Once the acrylic has dried, it’s time to shape the nails. Use a nail file to create the characteristic duck shape, focusing on achieving a wider base and a tapered tip.
After shaping, apply a top coat to enhance the shine and durability of your nails. If you wish to add color, paint your nails with your favorite polish before sealing with the top coat.
Maintaining Healthy Nails
After completing your duck-shaped acrylic nails, it’s essential to maintain their health. Apply cuticle oil to keep the surrounding skin hydrated and healthy.
Regular maintenance will ensure your nails look fresh and vibrant, allowing you to enjoy your stylish duck-shaped nails for an extended period.
Step-by-Step Duck Acrylic Nails Application
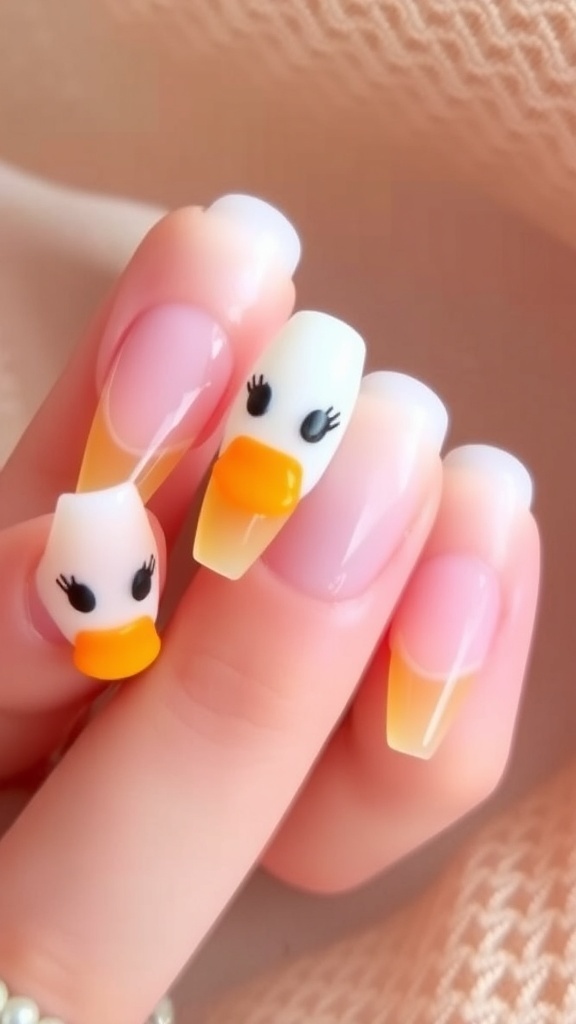
This duck-shaped acrylic nails tutorial covers the essential steps from preparing your natural nails to applying the acrylic and shaping them into the desired duck shape. The process typically takes about 1-2 hours, depending on your skill level.
Ingredients
- Acrylic nail kit (powder and liquid)
- Nail tips (preferably stiletto or coffin shape)
- Nail file and buffer
- Nail primer
- Nail glue
- Cuticle oil
- Top coat
- Nail polish (optional for color)
Instructions
- Prepare Your Nails: Start by cleaning your natural nails and pushing back your cuticles. Buff the surface of your nails to ensure the acrylic adheres properly.
- Apply Nail Tips: Choose the appropriate size nail tips and glue them onto your natural nails. Trim them to your desired length.
- Mix Acrylic: Follow the instructions on your acrylic kit to mix the powder and liquid. Use a brush to apply the acrylic mixture over the nail tips, building up the shape.
- Shape the Nails: Once the acrylic is dry, use a nail file to shape the nails into the duck shape, focusing on creating a wider base and a tapered tip.
- Finish with Polish: Apply a top coat for shine and durability. If desired, paint your nails with your favorite color before sealing with the top coat.
- Moisturize: Finish by applying cuticle oil to keep your nails healthy and hydrated.
Cook and Prep Times
- Prep Time: 15 minutes
- Application Time: 1 hour
- Total Time: 1 hour 15 minutes
- Servings: 1 set of nails
- Calories: N/A
- Fat: N/A
- Protein: N/A
- Carbohydrates: N/A
Related
- 90s Inspired Duck Nails Acrylic Tutorial
- 5 Effective Ways to Remove Acrylic Nails at Home
- 5 Stunning French Tip Designs for Almond Shaped Nails
- 5 Stunning French Nail Designs for Almond-Shaped Nails