This guide provides step-by-step instructions for drawing Rudolph, the beloved red-nosed reindeer. Perfect for holiday-themed art projects, this drawing is suitable for artists of all ages.
Using simple shapes and techniques, you can create a charming rendition of Rudolph that captures his festive spirit.
Materials Needed for Your Drawing
Before starting your drawing of Rudolph, gather all necessary materials to ensure a smooth process.
You will need a pencil for sketching, an eraser for corrections, and a black fine-tip marker or pen for outlining your drawing. Colored pencils or markers in red, brown, black, and white will help bring Rudolph to life on paper.
Lastly, have a sheet of drawing paper ready to capture your festive creation. With everything in place, you’re set to begin!
Step-by-Step Rudolph Drawing Instructions
This guide will lead you through the process of creating a delightful image of Rudolph, the iconic red-nosed reindeer. Each step is designed to be simple, making it suitable for artists of all ages.
Start by drawing a large oval for Rudolph’s head. This will serve as the base for his cheerful face. Next, sketch two curved lines extending from the top of the head for his playful antlers.
Adding Features to Rudolph
Once the basic shapes are in place, it’s time to add details that bring Rudolph to life. Begin with his face by drawing two small circles for the eyes and a larger oval for the nose, ensuring you leave space for his bright red nose.
Outline the ears by drawing two pointed shapes on each side of the head. These features will help define Rudolph’s character and charm.
Refining Rudolph’s Expression
To give Rudolph a more expressive look, refine his features by adding details like the mouth and eyebrows. These small touches will enhance his cheerful demeanor and make your drawing more engaging.
Once you’re satisfied with the pencil sketch, it’s time to ink your drawing. Use a black fine-tip marker to outline your pencil work, carefully tracing over the lines. After inking, erase any remaining pencil marks for a clean finish.
Coloring Your Drawing
Now comes the fun part—coloring! Start with Rudolph’s nose, coloring it bright red to capture its iconic look. For his antlers, use a rich brown shade, and color his face with a light brown hue.
Don’t forget to add white for the eyes, along with a touch of black for the pupils, to make them pop. This step will add depth and personality to your drawing.
Final Touches and Festive Decorations
To complete your artwork, consider adding final touches such as a scarf around Rudolph’s neck or festive decorations in the background. Snowflakes and Christmas lights can create a joyful holiday atmosphere, enhancing the overall appeal of your drawing.
Take a moment to step back and admire your creation. With these steps, you’ve captured the spirit of Rudolph the Red-Nosed Reindeer in a delightful drawing that celebrates the holiday season!
Step-by-Step Rudolph Drawing Instructions
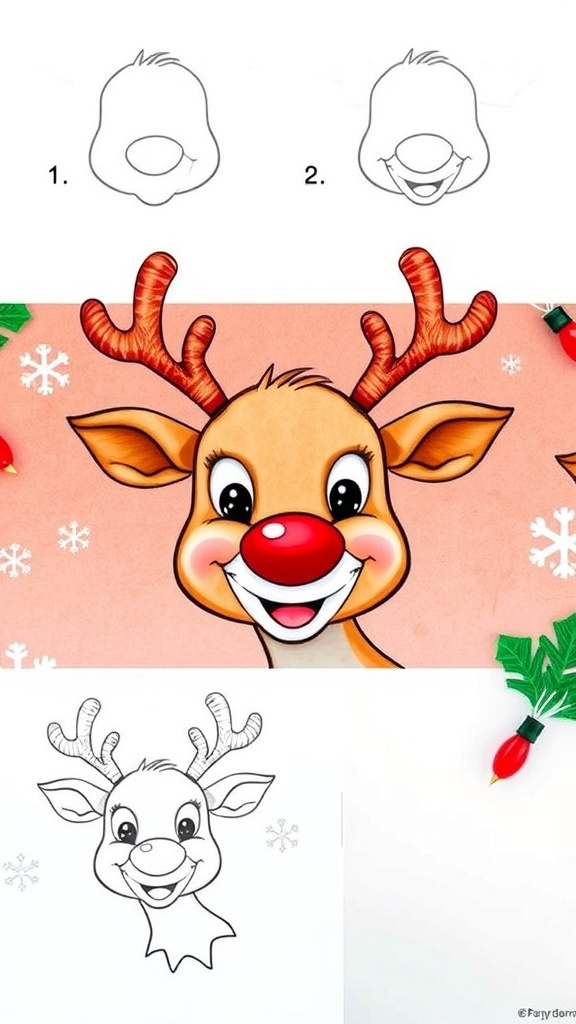
This drawing guide will help you create a delightful image of Rudolph with his iconic red nose and antlers. The process is straightforward and can be completed in about 30 minutes.
Ingredients
Related
- Rudolph the Red-Nosed Reindeer Coloring Pages
- Rudolph the Red-Nosed Reindeer Christmas Cookies
- Rudolph the Red-Nosed Reindeer Christmas Door Decoration
- Rudolph the Red-Nosed Reindeer Drawing Guide