Looking to add a splash of color and creativity to your Easter celebrations? This egg painting guide will inspire you to unleash your artistic flair. With simple supplies and techniques, you can turn ordinary eggs into beautiful works of art that will delight friends and family.
Egg painting is more than just a fun activity; it’s a cherished tradition that brings joy and creativity to the holiday. Whether you’re a seasoned artist or a beginner, this guide will help you create stunning designs that will make your Easter festivities truly memorable.
Creative Techniques for Beautiful Egg Art
Painting Easter eggs is a delightful way to express creativity and embrace the festive spirit of the holiday. With a variety of techniques available, each one allows for stunning personal expression, ensuring that no two eggs are the same.
From classic dyeing methods to intricate hand-painting, there are endless possibilities for transforming ordinary eggs into vibrant masterpieces. Whether you’re aiming for bold patterns or subtle designs, each technique brings its own charm to your Easter celebrations.
Preparation for Your Egg Painting Session
Before diving into the colorful world of egg painting, it’s essential to prepare your materials. Start with clean, dry eggs, which can be either hard-boiled or blown out for longevity.
Gather non-toxic food coloring or dyes, paintbrushes of varying sizes, and a few cups of water for rinsing your brush between colors. Having paper towels handy is also useful for drying your painted creations.
Dyeing Your Easter Eggs
Dyeing eggs is a classic technique that offers quick yet stunning results. To get started, submerge your eggs in bowls of dye, allowing them to soak for a few minutes depending on the desired intensity of color.
Use a spoon to carefully remove the eggs, letting them dry on paper towels. This method results in beautifully colored bases for more intricate designs if you choose to add hand-painted details later.
Hand-Painting Techniques
For those who wish to elevate their egg art, hand-painting is an excellent option. Once your dyed eggs have dried completely, you can use brushes to apply food-safe paint.
Think about various designs, from simple polka dots to elaborate floral patterns or scenes that tell a story. This is where your artistic flair truly shines, allowing each egg to reflect your unique style.
Finishing Touches and Displaying Your Creations
Once your paint has dried, it’s time to consider adding some extra flair. Glitter and stickers can be delightful additions that enhance the visual appeal of your eggs.
When your masterpieces are complete, arrange them in a vibrant basket or use them as decorative pieces throughout your home. This not only brightens your space but also showcases the effort and creativity poured into each piece.
Creating a Festive Atmosphere
The beauty of painted Easter eggs goes beyond their individual charm; they contribute to the overall festive atmosphere of the holiday. Displaying these colorful artworks against a backdrop of spring flowers and soft lighting can create a cheerful setting that captivates everyone who visits.
As you gather with family and friends, these creatively painted eggs become a source of joy, conversation, and celebration, reminding everyone of the fun and creativity involved in this cherished tradition.
Creative Techniques for Beautiful Egg Art
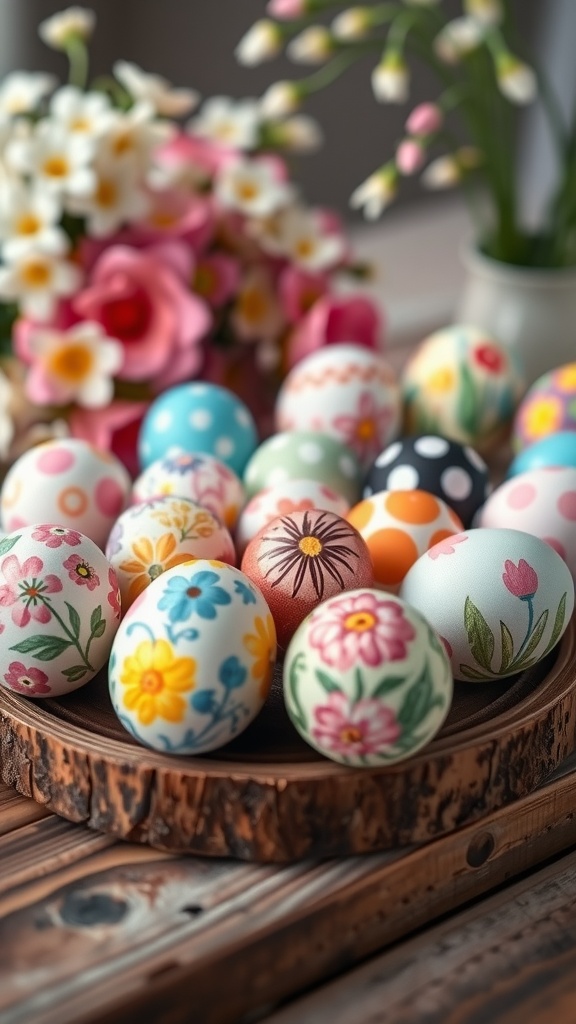
This guide covers various painting techniques, from classic dyeing methods to intricate hand-painting styles. Each method allows for personal expression, resulting in unique, colorful eggs that can be displayed proudly.
Ingredients
- White eggs (hard-boiled or blown)
- Non-toxic food coloring or dye
- Paintbrushes of varying sizes
- Water cups for rinsing brushes
- Paper towels for drying
- Patience and creativity
Instructions
- Prepare the Eggs: Start with clean, dry eggs. If using raw eggs, consider blowing them out for longer-lasting decorations.
- Dyeing the Eggs: Submerge eggs in a bowl of dye for a few minutes. Use a spoon to remove them and let them dry on a paper towel.
- Hand-Painting: Once dried, use paintbrushes and food-safe paints to create designs. You can paint patterns, flowers, or even intricate designs based on your skill level.
- Add Finishing Touches: Once the paint is dry, consider adding glitter or stickers for extra flair.
- Display Your Art: Arrange your painted eggs in a basket, or use them to decorate your home for Easter.
Cook and Prep Times
- Prep Time: 15 minutes
- Paint Time: 1 hour
- Total Time: 1 hour 15 minutes
- Servings: Varies based on the number of eggs used
- Calories: N/A
- Fat: N/A
- Protein: N/A
- Carbohydrates: N/A
Related
- Duck Painting Techniques for Beginners
- Duck Oil Painting Techniques
- Strawberry Shortcake Painting Ideas and Techniques
- 5 Easy DIY Haircut Techniques You Can Try at Home