This Buttercream French Nails tutorial offers a stylish twist on the classic French manicure. With a soft buttercream color, this design is perfect for any occasion, providing a chic and elegant look.
The process is simple and requires basic nail art techniques. You can customize the design with different colors or nail art embellishments to match your personal style.
Overview of Buttercream French Nails
The Buttercream French Nails design offers a modern take on the timeless French manicure.
With its soft buttercream base and crisp white tips, this style is perfect for various occasions, from casual outings to formal events.
The combination of colors creates an elegant look that enhances the natural beauty of your hands.
Essential Tools and Materials
To achieve the Buttercream French Nails, gather the necessary tools and materials.
You’ll need a base coat to protect your nails, buttercream nail polish for the base, and white nail polish for the tips.
A top coat is essential for sealing the design and adding shine, while a nail art brush or striping tape helps create precise tips. Don’t forget a nail file and cuticle oil for finishing touches!
Preparation Steps for a Flawless Manicure
Start by prepping your nails to ensure a smooth application.
File your nails to your desired shape and gently push back your cuticles.
Cleaning your nails with polish remover will help eliminate any oils, creating a perfect canvas for your manicure.
Applying the Base Coat and Buttercream Polish
Once your nails are prepped, apply a thin layer of base coat.
This step not only protects your nails but also enhances the longevity of your manicure.
After the base coat dries, apply two coats of buttercream nail polish, allowing each coat to dry completely for the best results.
Creating the French Tips
With the buttercream base set, it’s time to add the iconic white tips.
Using a nail art brush or striping tape, carefully paint the tips of your nails with white nail polish.
Take your time with this step to ensure clean lines, and allow the tips to dry thoroughly before moving on.
Finishing Touches for a Polished Look
To complete your Buttercream French Nails, apply a top coat over the entire nail.
This not only seals the design but also adds a beautiful shine, preventing chipping.
Finally, once the top coat has dried, nourish your cuticles with cuticle oil to keep them healthy and hydrated.
Step-by-Step Buttercream French Nails
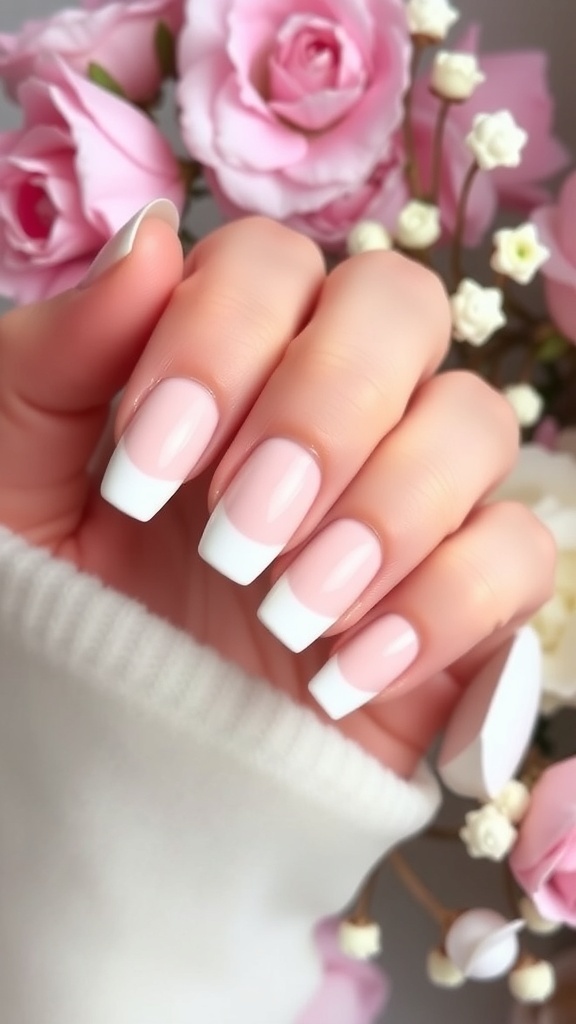
This tutorial guides you through creating a beautiful buttercream French manicure at home. The process takes about 45 minutes and is suitable for both beginners and experienced nail art enthusiasts.
Ingredients
- Base coat
- Buttercream nail polish
- White nail polish for tips
- Top coat
- Nail art brush or striping tape
- Nail file
- Cuticle oil
Instructions
- Prep Your Nails: Start by filing your nails to your desired shape and pushing back your cuticles. Clean your nails with polish remover to remove any oils.
- Apply Base Coat: Apply a thin layer of base coat to protect your nails and enhance the longevity of your manicure.
- Paint with Buttercream: Once the base coat is dry, apply two coats of buttercream nail polish, allowing each coat to dry completely.
- Create the French Tips: Using a nail art brush or striping tape, carefully paint the tips of your nails with white nail polish. Allow the tips to dry.
- Seal with Top Coat: Once the white tips are dry, apply a top coat to seal the design and add shine. This will also help prevent chipping.
- Finish with Cuticle Oil: After the top coat has dried, apply cuticle oil to nourish your cuticles and complete your manicure.
Cook and Prep Times
- Prep Time: 10 minutes
- Nail Application Time: 35 minutes
- Total Time: 45 minutes
- Servings: 1 set of nails
- Calories: N/A
Related
- Duck-Shaped Acrylic Nails Tutorial
- 90s Inspired Duck Nails Acrylic Tutorial
- Red Christmas Dip Nails Tutorial
- Easy Strawberry Shortcake Nails Tutorial